I've been taking a different approach to making
parts that use Kevlar these days... since Kevlar is so difficult to
cut - I'm trying to not have to cut it at all - at least after it
comes out of the mold...
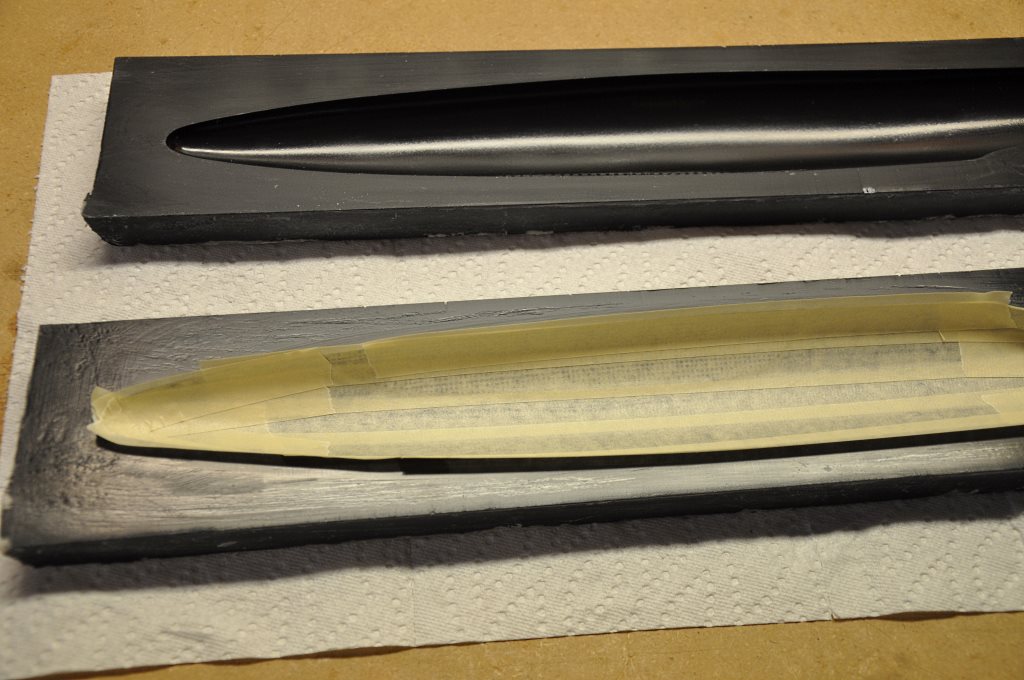
So I'm making templates for my Kevlar.
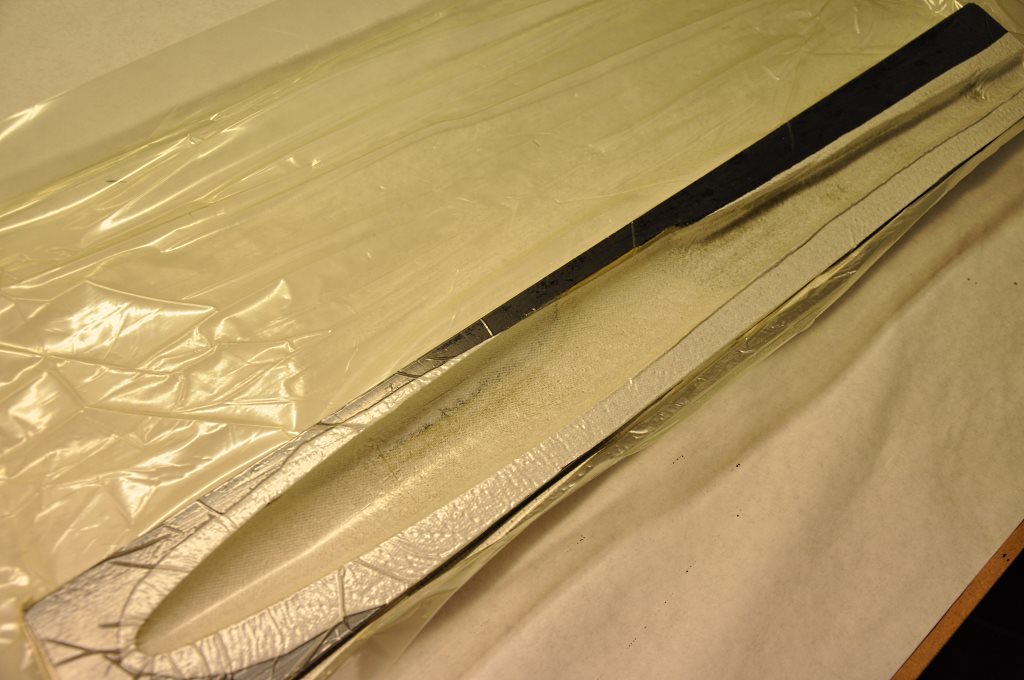
I start by placing strips of masking tape into my mold. This captures the exact shape of the fabric that will go into the mold.
So I'm making templates for my Kevlar.
I start by placing strips of masking tape into my mold. This captures the exact shape of the fabric that will go into the mold.
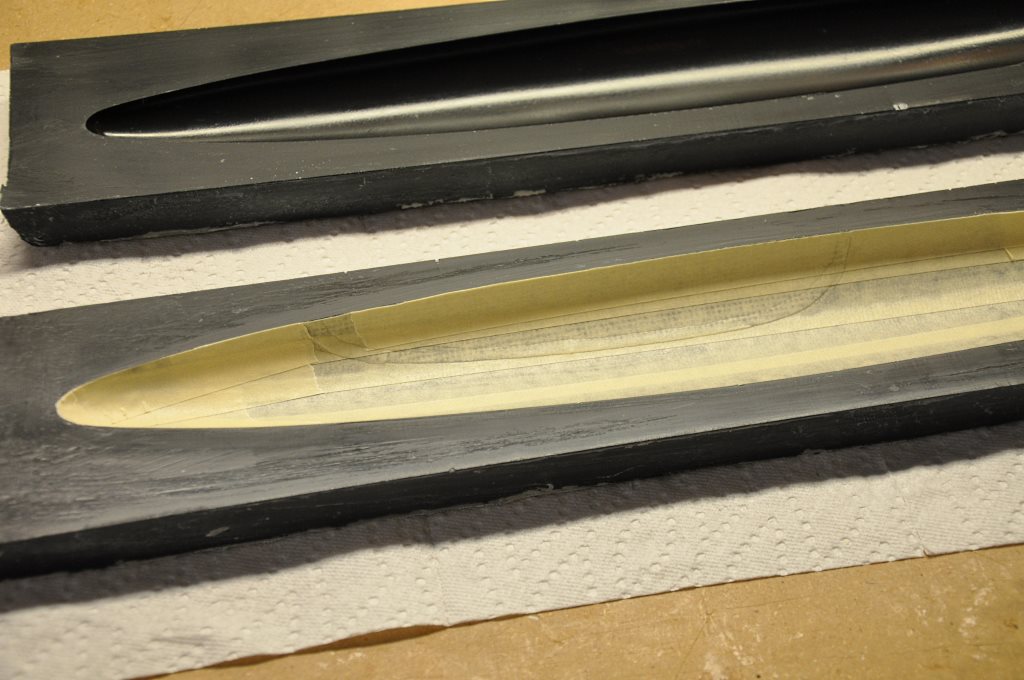
I then trim the masking tape right to the edge of
the mold.
I repeated this process for the other half as well - creating two templates.
I repeated this process for the other half as well - creating two templates.
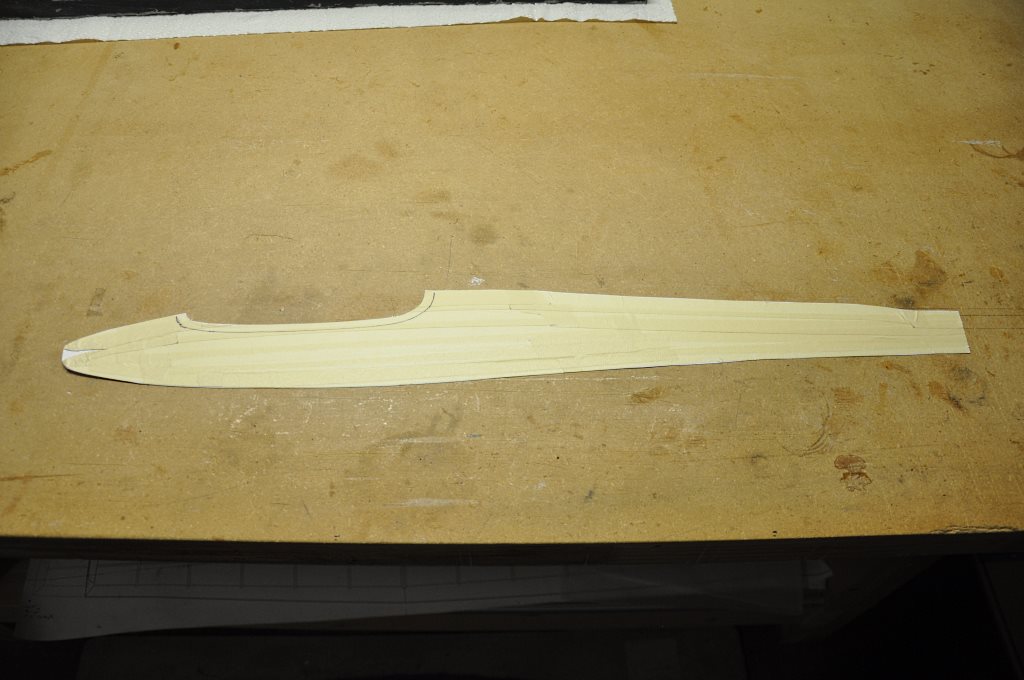
Once the masking tape is carefully removed from
the mold, I can tape it to some poster board.
The poster board preserves the shape and gives a bit of an edge to guide a pen while tracing the shape onto the fabric.
Note that I cut a slit at the nose area in order for the tape to lay flat. I also cut away all but the lip of the hatch area.
The poster board preserves the shape and gives a bit of an edge to guide a pen while tracing the shape onto the fabric.
Note that I cut a slit at the nose area in order for the tape to lay flat. I also cut away all but the lip of the hatch area.
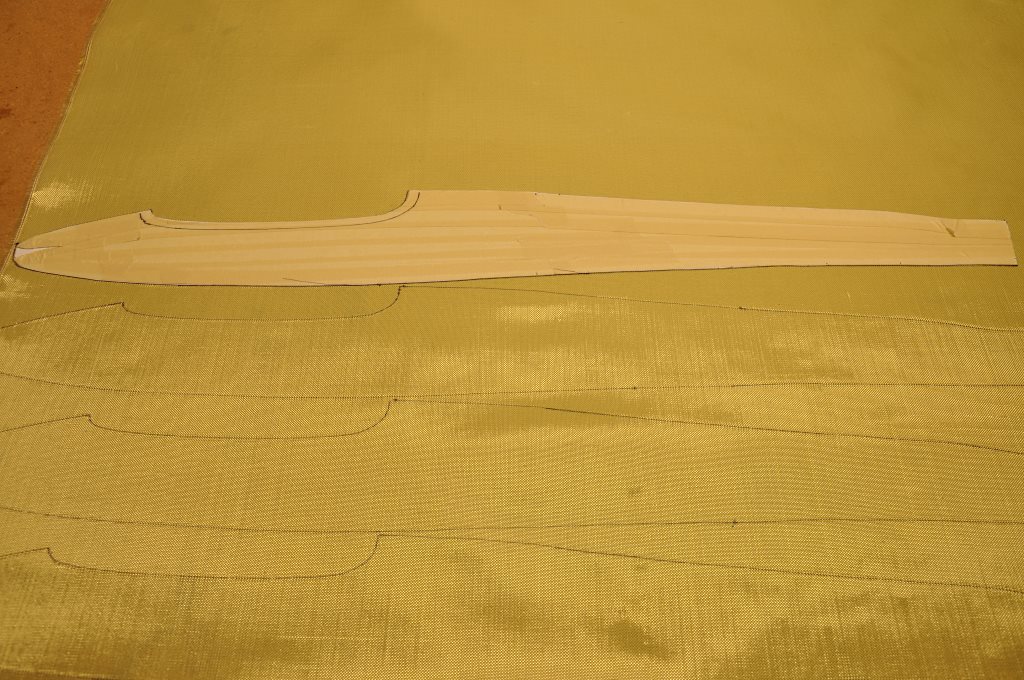
The template can then be used to trace multiple
copies of our shape.
For cutting my Kevlar, I use ordinary scissors that I've filed the blades to a 90 degree angle... This works quite well.
For cutting my Kevlar, I use ordinary scissors that I've filed the blades to a 90 degree angle... This works quite well.
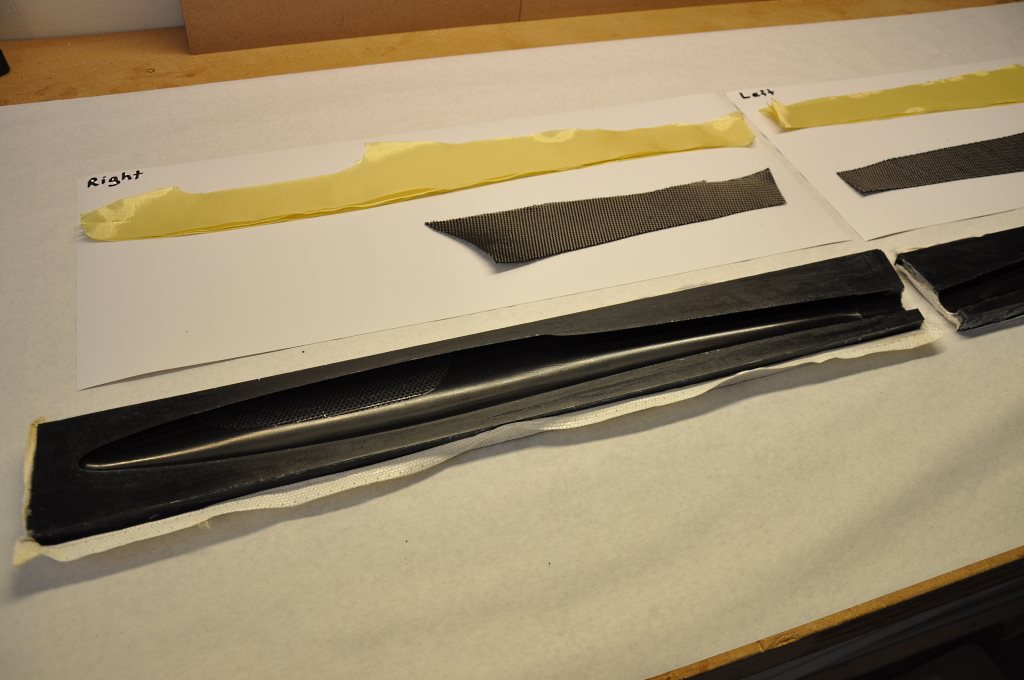
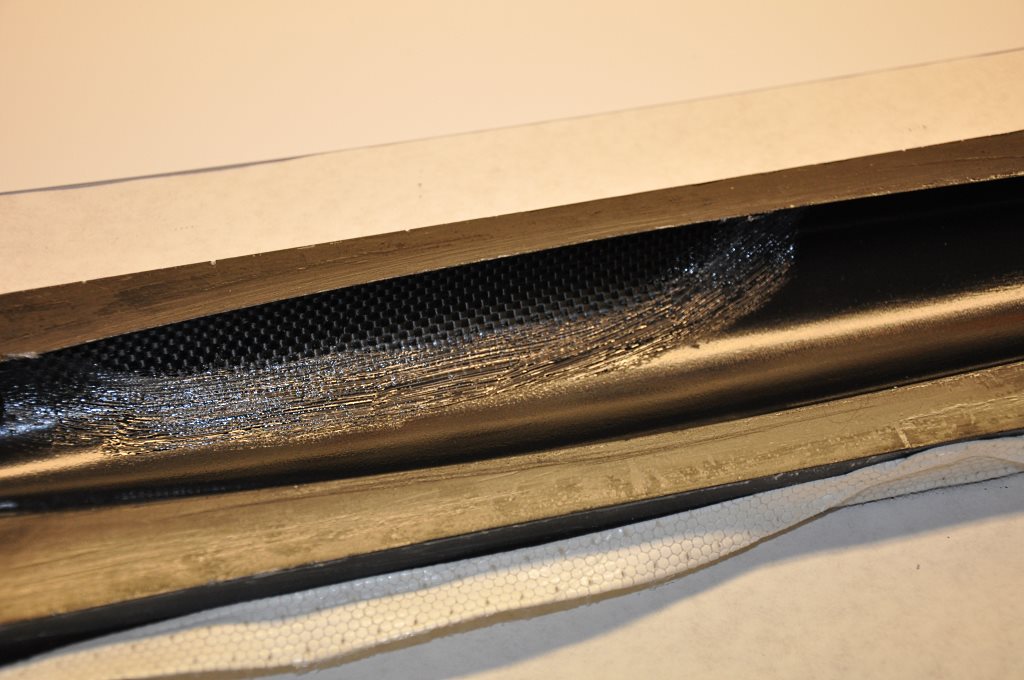
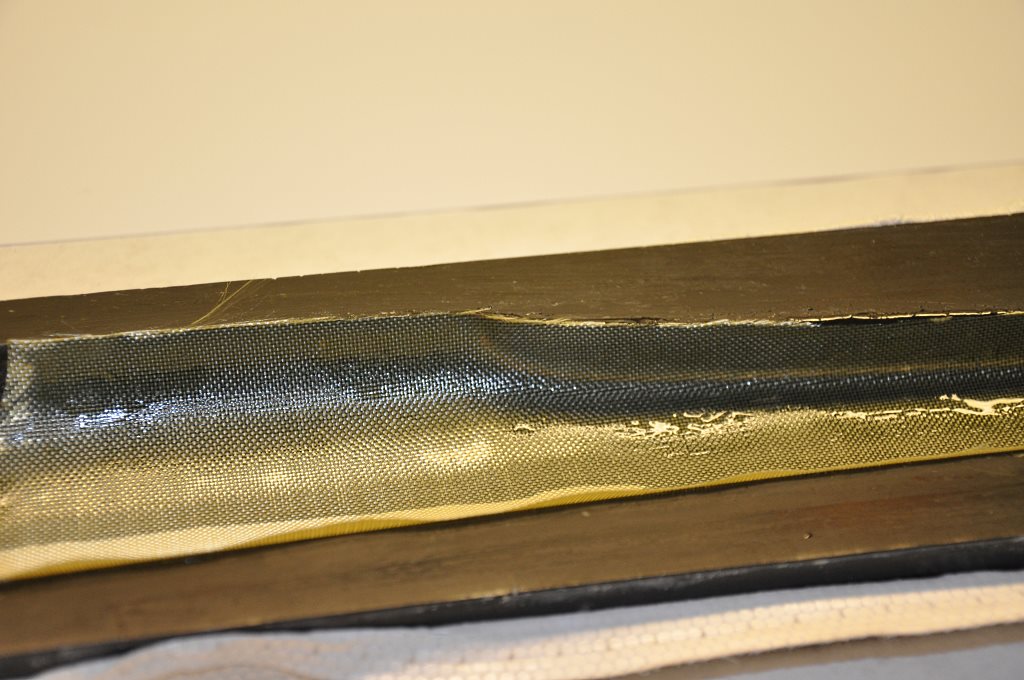
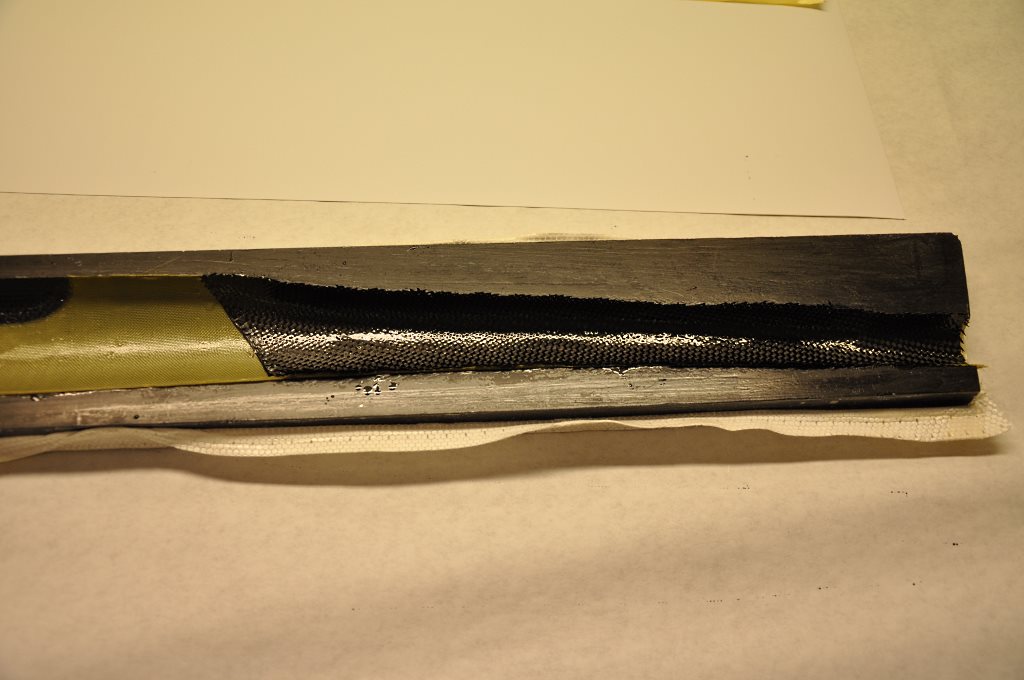
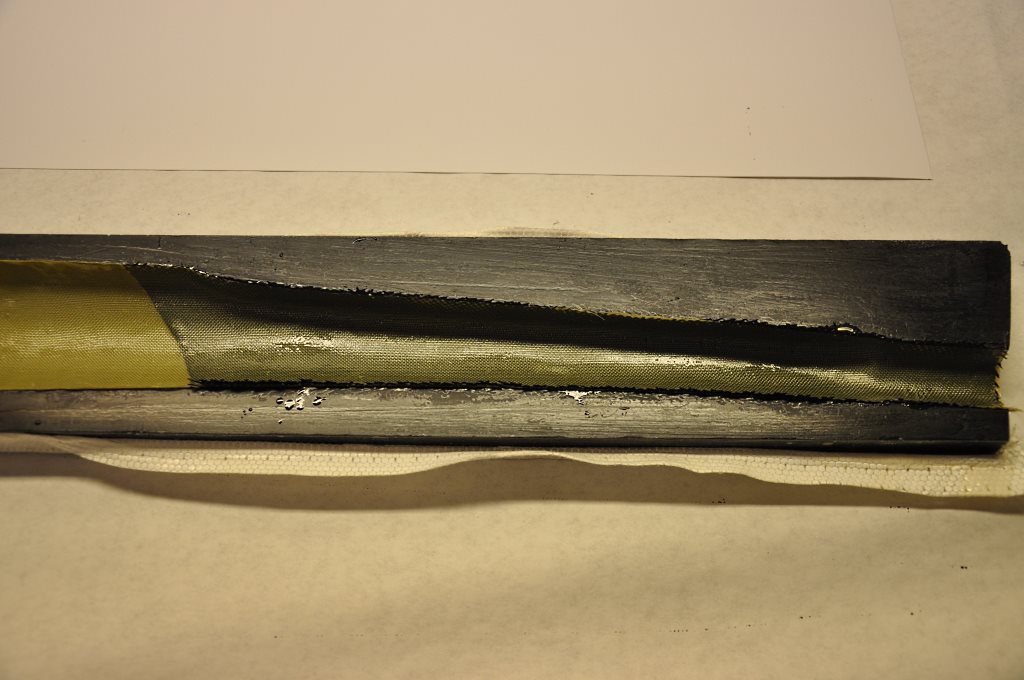
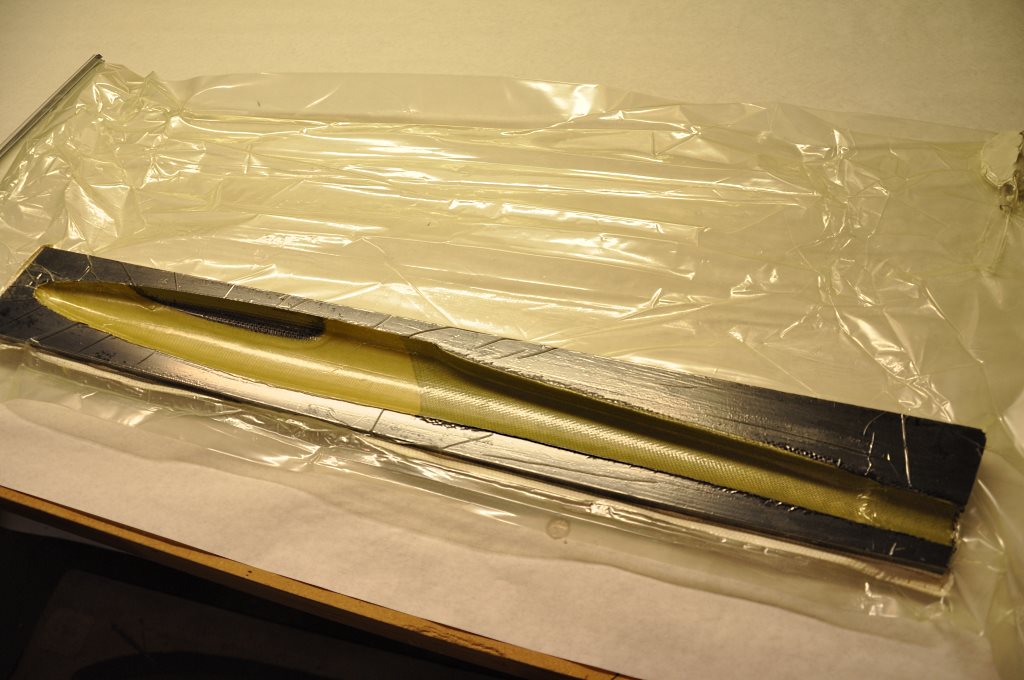
For the fuse pod layups, I'm using the same 4
layers of 1.7 oz. Kevlar as specified in the plans, however; I've
modified the carbon used in the layup to just have the area under
the wing saddle have a complete wrap of 5.7 oz. carbon cloth on a 45
degree bias.
This idea isn't a complete invention on my part, as this is what the Supra fuselage does...
The carbon will be laid up between the 3rd and 4th layers of Kevlar.
This idea isn't a complete invention on my part, as this is what the Supra fuselage does...
The carbon will be laid up between the 3rd and 4th layers of Kevlar.

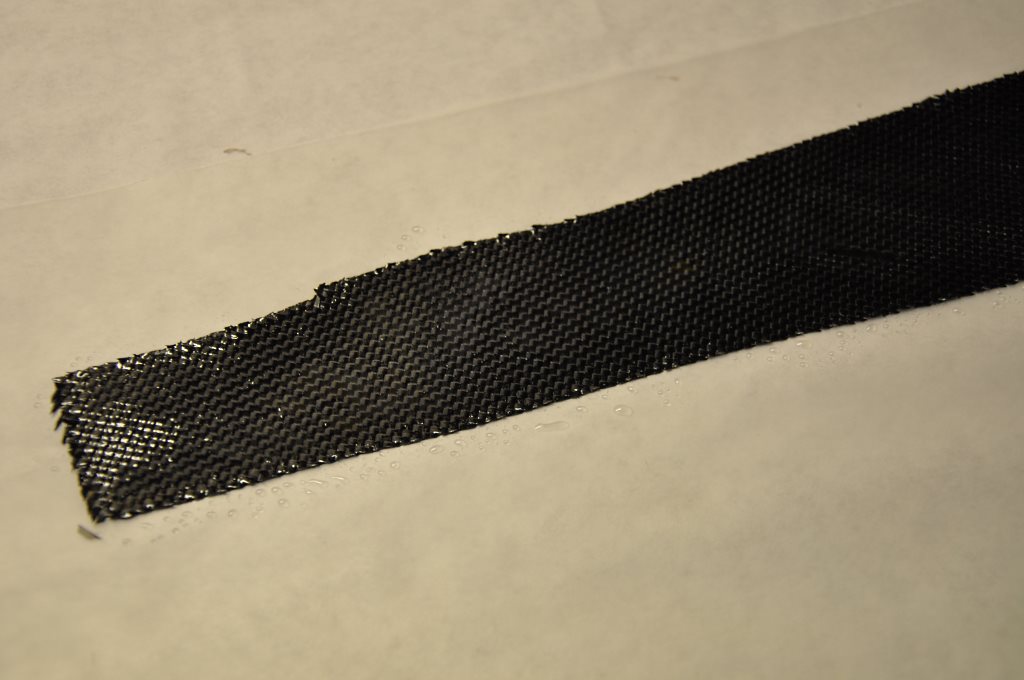
I was curious at the fabric weight in keeping
with the "weigh everything" mantra...
26.8 g. of fabric (two sides)... Looks like I've got a pretty good shot at meeting the 53 g. fuse shell target.
26.8 g. of fabric (two sides)... Looks like I've got a pretty good shot at meeting the 53 g. fuse shell target.
With all my fabric cut I'm ready to start the
layup.
I'm using West 206 (slow) hardener, so I've got enough working time to do one entire half with a single pot of epoxy.
I mixed up the epoxy and immediately poured some of it into a second mixing cup. I added silica to this one to thicken it up.
Using a brush I painted the thickened epoxy at the hatch lip and the tail boom lip (see below).
Using thickened epoxy at these sharp corners
allows the molt to make the sharp corner, where the fabric would
have a hard time doing so...
The first time I laid up one of these halves I
had a little difficulty getting the carbon cloth saturated by the
time I got to its place in the layup. (10 or so minutes after
mixing the epoxy it was starting to gel and wasn't soaking into the
cloth as well.)
So I modified my approach. I inverted the carbon on a piece of wax paper and poured some epoxy onto the carbon the instant the epoxy was mixed. I could then quickly spread it onto all the carbon fabric and by the time I was ready for it in the layup, it was completely saturated... very easy this way!
So I modified my approach. I inverted the carbon on a piece of wax paper and poured some epoxy onto the carbon the instant the epoxy was mixed. I could then quickly spread it onto all the carbon fabric and by the time I was ready for it in the layup, it was completely saturated... very easy this way!
I have discovered that for these layups I can use
a brush to paint a coat of epoxy over the entire surface of the
mold, and with the exception of a few touch-up spots - that's all
the epoxy I need.
So I paint the epoxy into the mold, and lay in the first piece of Kevlar being careful to get the fabric right up to the edges.
The resin soaks right into the fabric.
So I paint the epoxy into the mold, and lay in the first piece of Kevlar being careful to get the fabric right up to the edges.
The resin soaks right into the fabric.
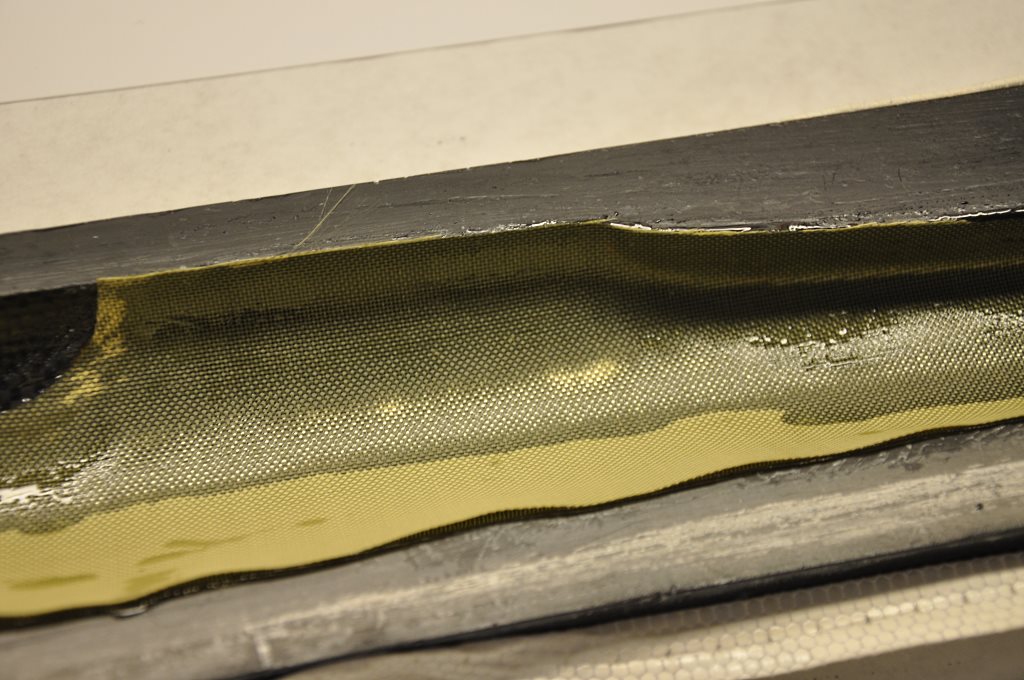
I add in the second and third layers and the
resin continues to soak up into the fabric...
Any area that is a bit slow to saturate can be encouraged to do so by stippling that area with the brush...
The vertical areas may need a little more epoxy, as the epoxy may have run down a bit in those locations, so brush some more on if needed.
Any area that is a bit slow to saturate can be encouraged to do so by stippling that area with the brush...
The vertical areas may need a little more epoxy, as the epoxy may have run down a bit in those locations, so brush some more on if needed.
Now I have 3 layers of Kevlar in the mold and
there is still plenty of epoxy left over...
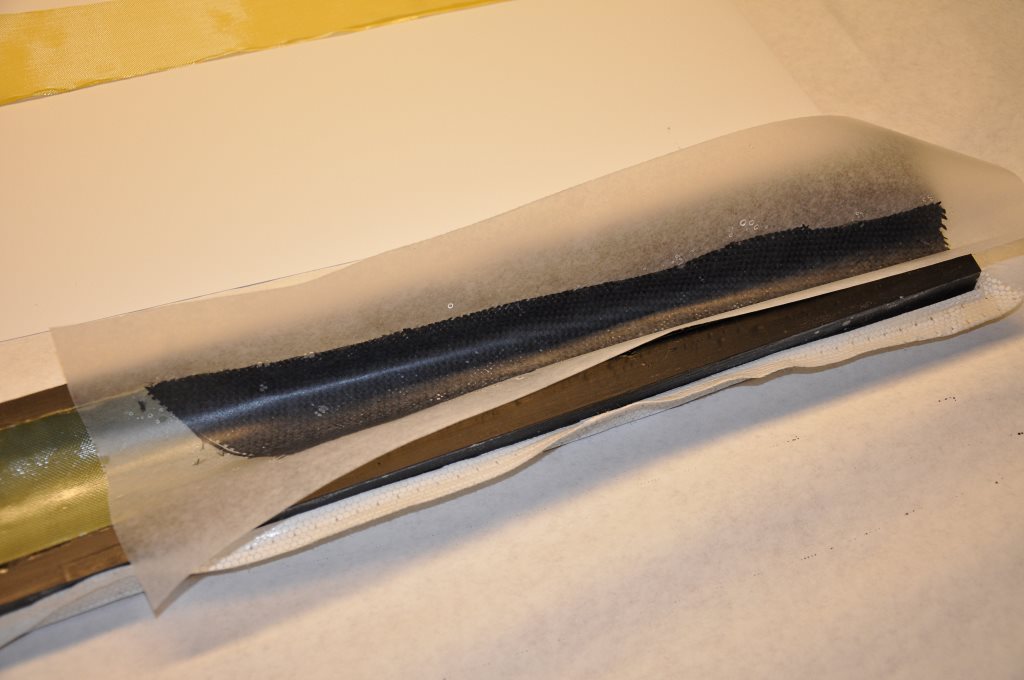
I picked up the carbon fiber using the wax paper
and flip it over into position.
Removing the wax paper shows that there is more
than enough resin to provide saturation for the final layer of
Kevlar.
I placed the final piece of Kevlar and made sure
that everything was well saturated with epoxy.
In spite of having used very little epoxy, I
still have too much and will now remove as much as I am able.
The epoxy is starting to gel, but it is still wet enough to soak up with paper towels.
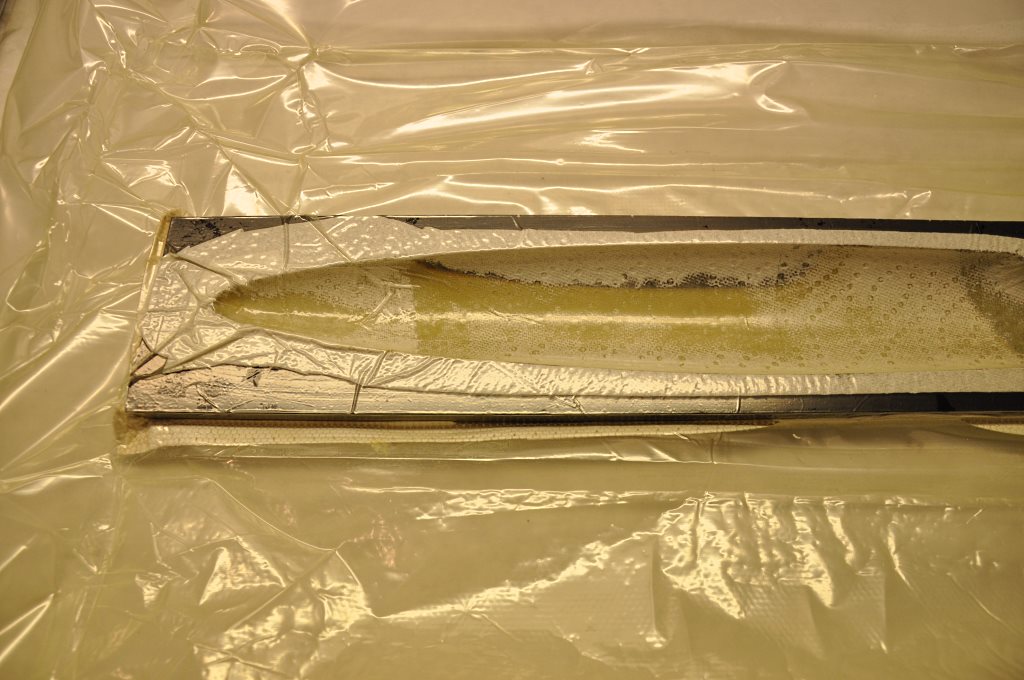
I place paper towels over the layup and slide it into a vacuum bag.
I try to be quick with this process... as soon as the paper towel is soaked, I replace it with another an reapply the vacuum.
The epoxy is starting to gel, but it is still wet enough to soak up with paper towels.
I place paper towels over the layup and slide it into a vacuum bag.
I try to be quick with this process... as soon as the paper towel is soaked, I replace it with another an reapply the vacuum.
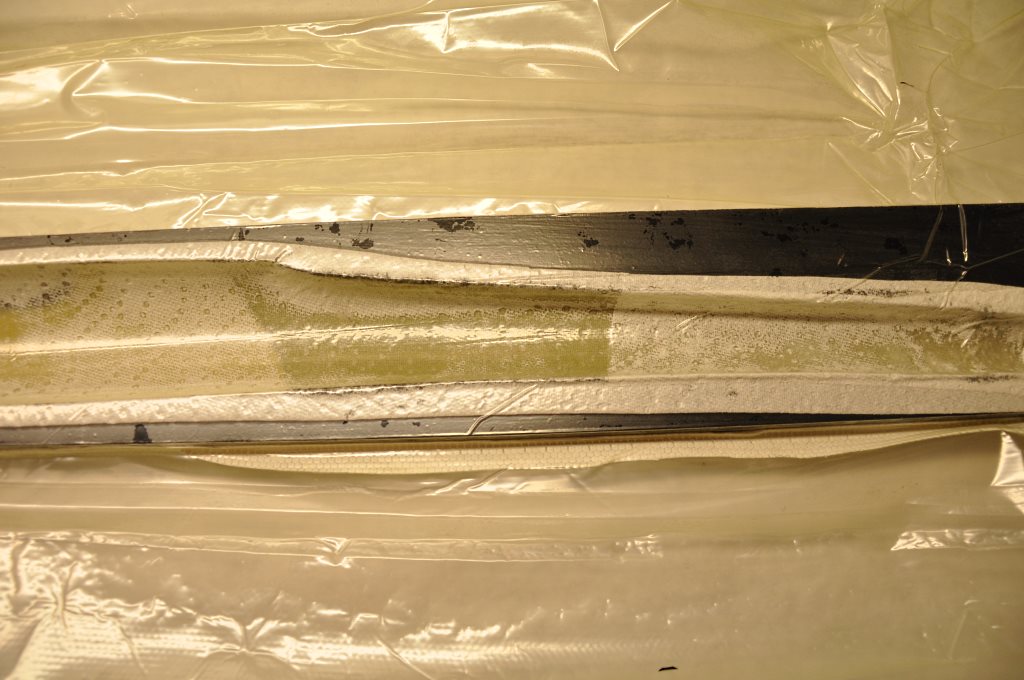
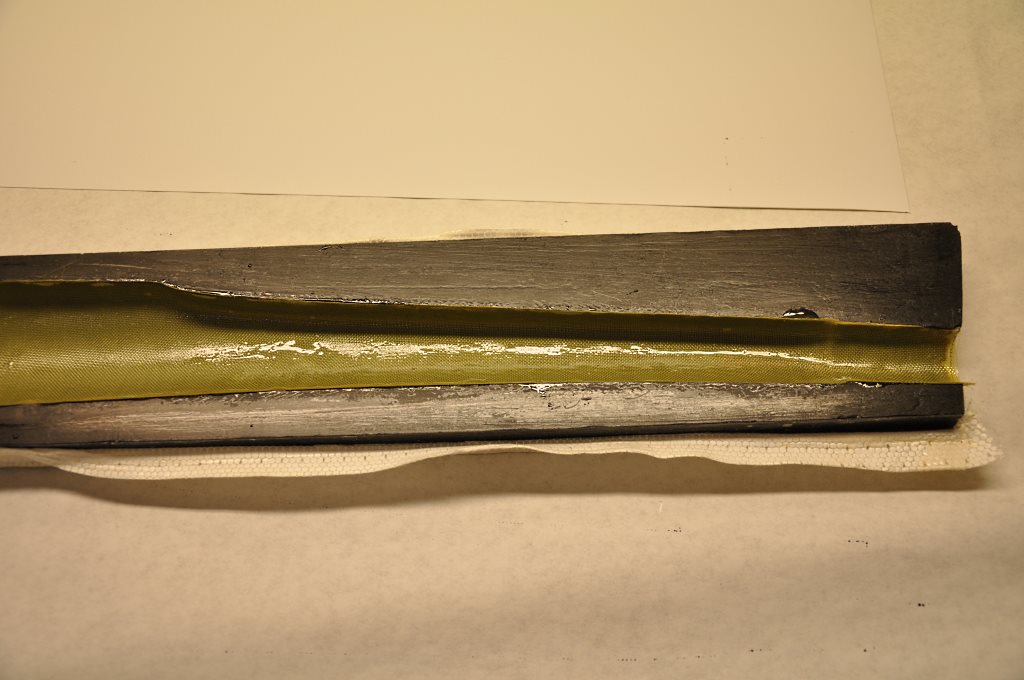
You can see that some areas, especially where the
carbon cloth is, have more resin to remove.
I continue replacing the paper towels until these areas stop saturating the towels.
I continue replacing the paper towels until these areas stop saturating the towels.
After about the 3rd or 4th exchange of paper
towels, all the excess resin has been removed.
The total elapsed time during this paper towel process is perhaps 15 minutes. And it has been 30 minutes since the epoxy was first mixed.
The total elapsed time during this paper towel process is perhaps 15 minutes. And it has been 30 minutes since the epoxy was first mixed.
Finally, I remove the last paper towel and
re-apply vacuum pressure.
At this point the part is ready for cure to solid and I leave it under vacuum overnight.
At this point the part is ready for cure to solid and I leave it under vacuum overnight.
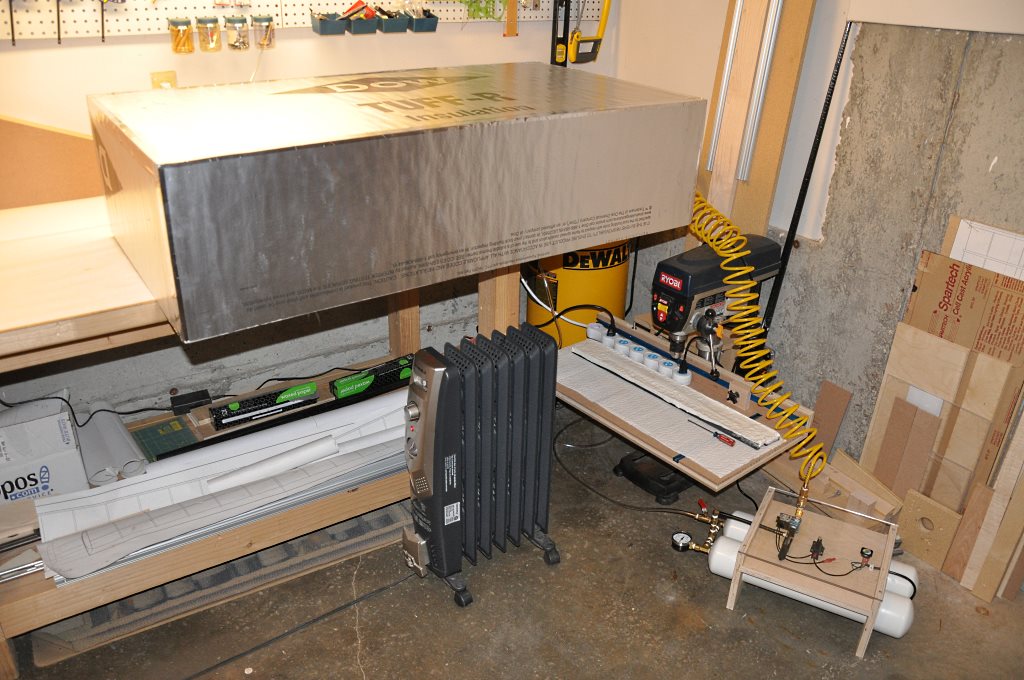
I made a very simple "hot box" out of foil lined
foam board.
I can place the box over whatever part is curing under vacuum, leaving part of the box overhanging my workbench. I then roll one of my shop heaters under the overhang and the rising heat warms the inside of the box very nicely - simple, yet effective... The part will now cure in 3 hours instead of 12.
In this picture you can see my vacuum system on the floor. The system is explained a bit on my vacuum press page.

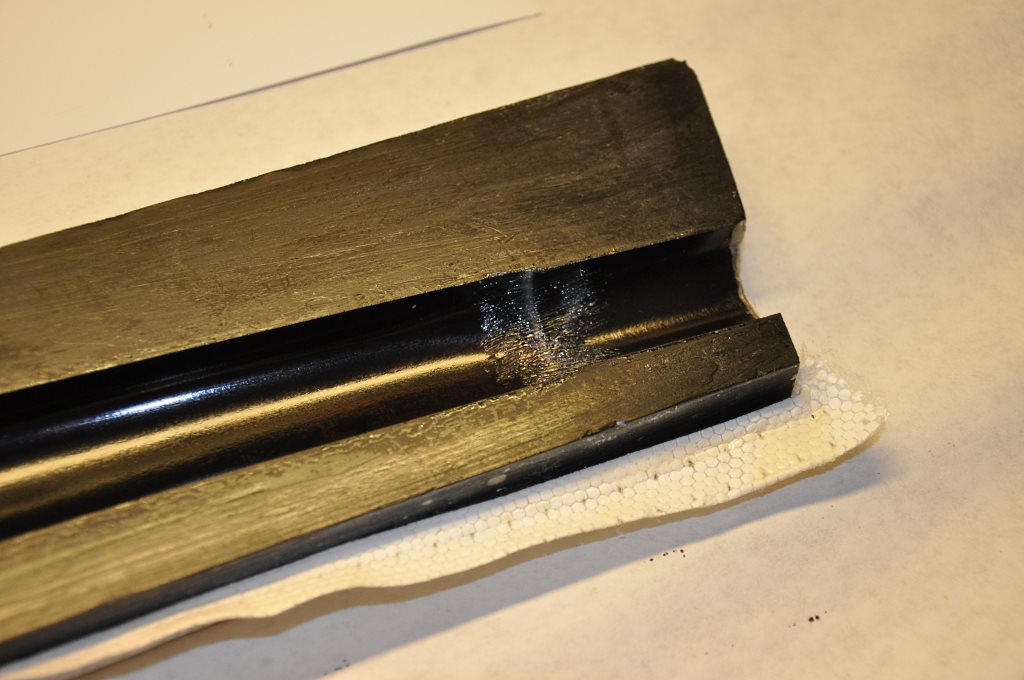
The finished fuse pod and hatch... This one
weighing 47.7 grams.
The target for pod and hatch is 62 grams. I like how this is going!
The target for pod and hatch is 62 grams. I like how this is going!
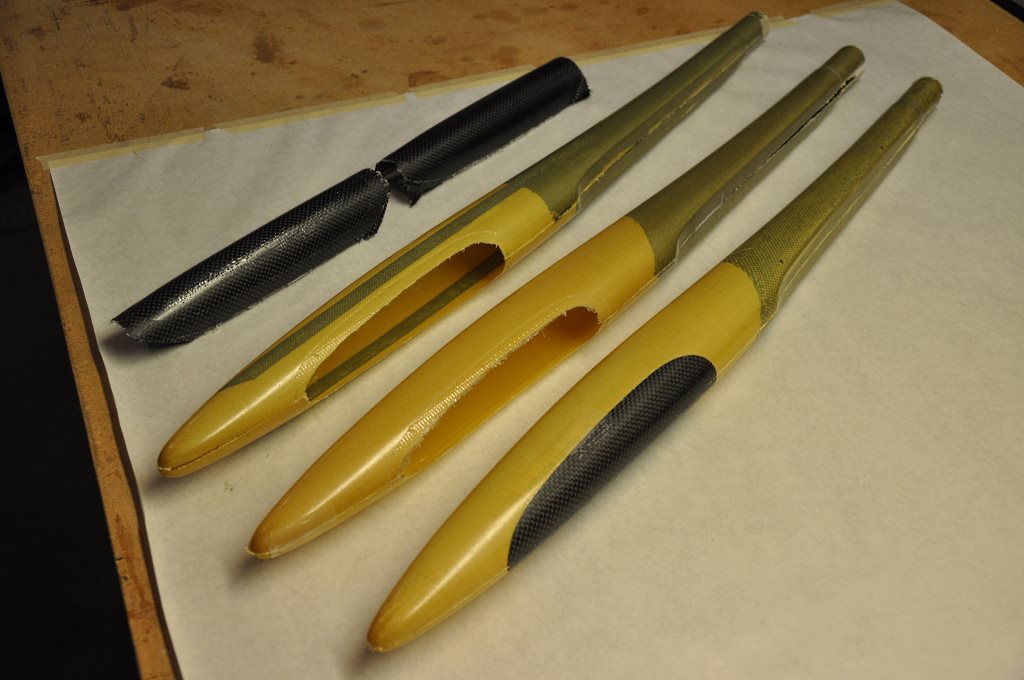
I experimented with the layup schedule and
process on a number of parts.
These are being held together with tape awaiting final assembly.
These are being held together with tape awaiting final assembly.

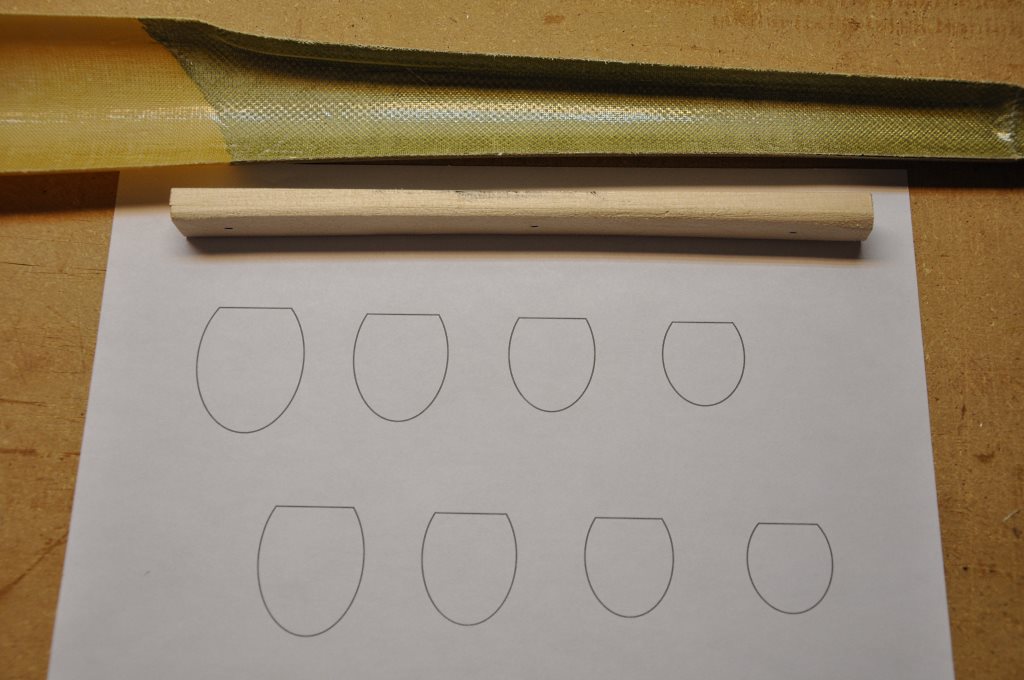
To make the fuselage bulkheads, sandwich 3/16"
hard balsa between two layers of 1/32" plywood.
I printed out bulkhead templates from my custom pod design to make the shaping process easier.
Make sure the balsa grain is horizontal when you make these bulkheads.
I printed out bulkhead templates from my custom pod design to make the shaping process easier.
Make sure the balsa grain is horizontal when you make these bulkheads.
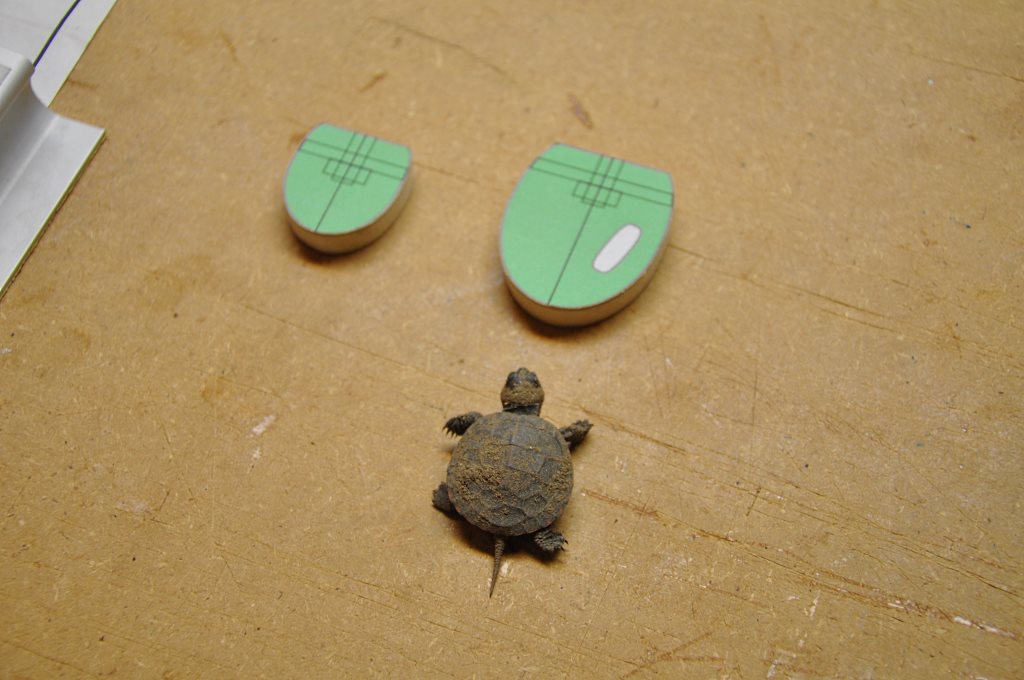
As I was making these bulkheads, I walked outside
to check the mail and discovered this little guy on my driveway!
I had him pose for a few quick pictures and then helped him find his
way to a pond next to my house.
Here the bulkheads have been shaped.
Here the bulkheads have been shaped.
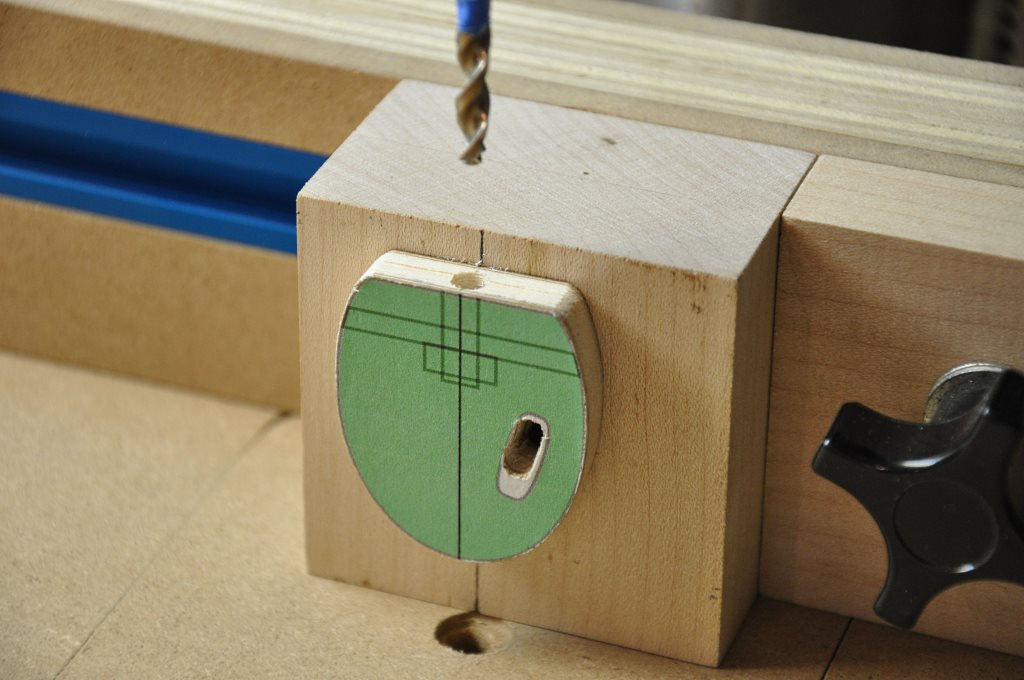
I cut my spoiler servo wire hole (incidentally,
on the opposite side from what the plans show) and then mounted the
bulkheads very, very carefully to drill the wing-bolt holes.
A 3/16" drill will make the proper hole for a 10-32 nylon bolt.
A 3/16" drill will make the proper hole for a 10-32 nylon bolt.
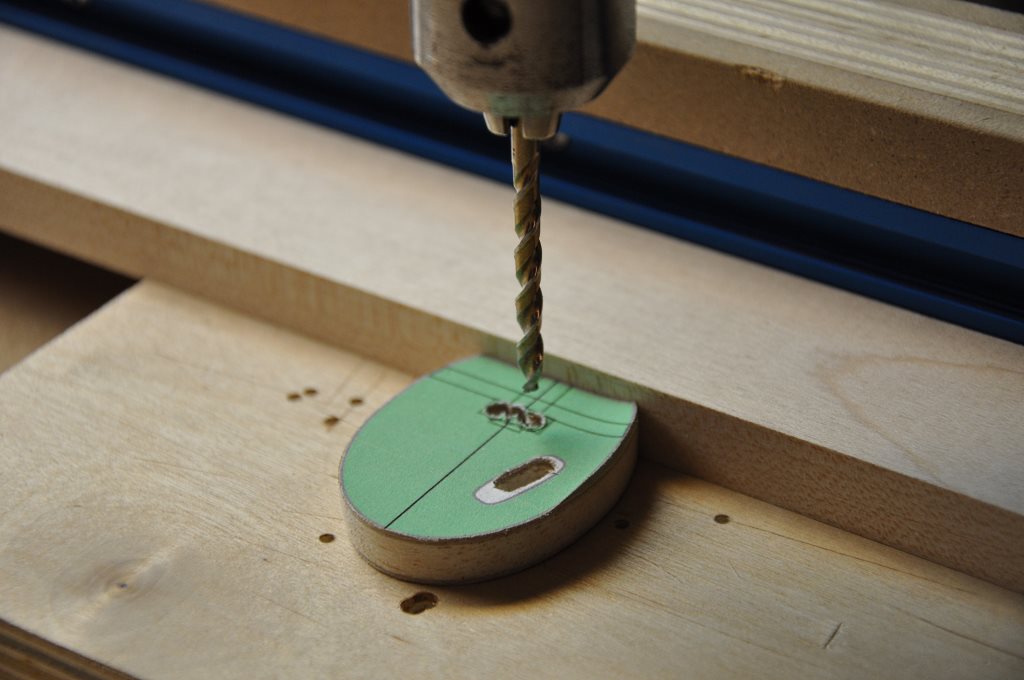
Next, I drilled the rough opening for the nylon
nut that will hold the wing bolt.
The bulkheads will attach to the tow hook beam,
so I need to get that made.
The beam is made from 3/4" wide basswood.
I printed a few cross sections of the pod at the tow beam to guide the rounding of the beam.
You will notice in this picture, the under curve has already been shaped to match the pod.
The beam is made from 3/4" wide basswood.
I printed a few cross sections of the pod at the tow beam to guide the rounding of the beam.
You will notice in this picture, the under curve has already been shaped to match the pod.
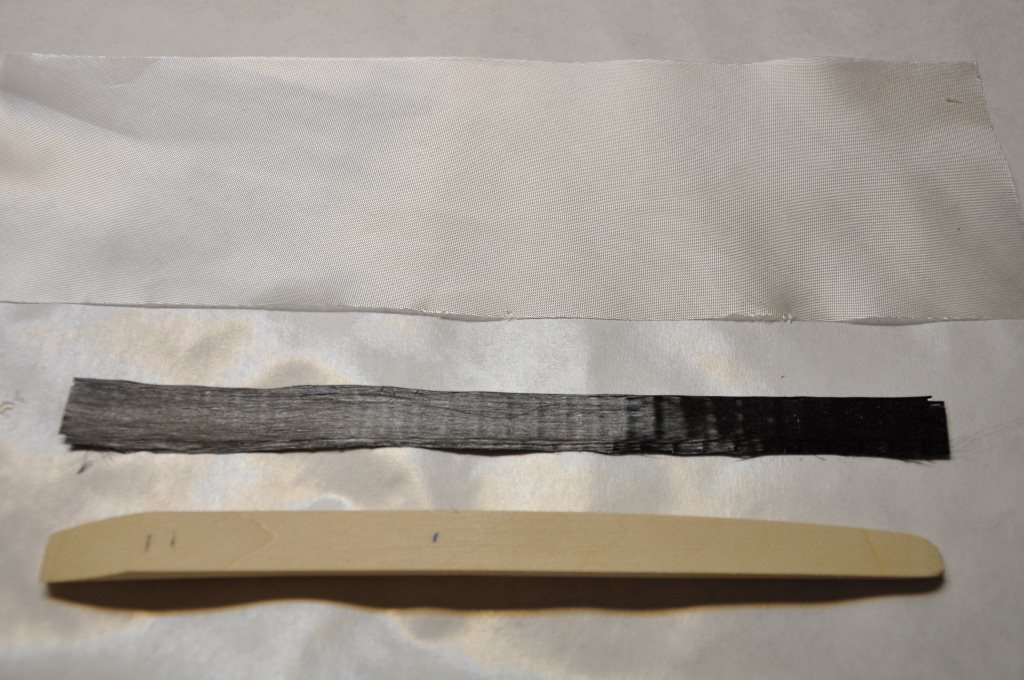
Next we need to laminate .021" of uni carbon
fiber onto the tow beam.
The plans call for pre-preg carbon fiber and that is what I used on my first Bubble Dancer, however; this time I just used some scrap uni that I had laying around - same difference...
Once the carbon is on the beam, wrap the whole assembly with 2oz. bias fiberglass and brush on epoxy.
The plans call for pre-preg carbon fiber and that is what I used on my first Bubble Dancer, however; this time I just used some scrap uni that I had laying around - same difference...
Once the carbon is on the beam, wrap the whole assembly with 2oz. bias fiberglass and brush on epoxy.
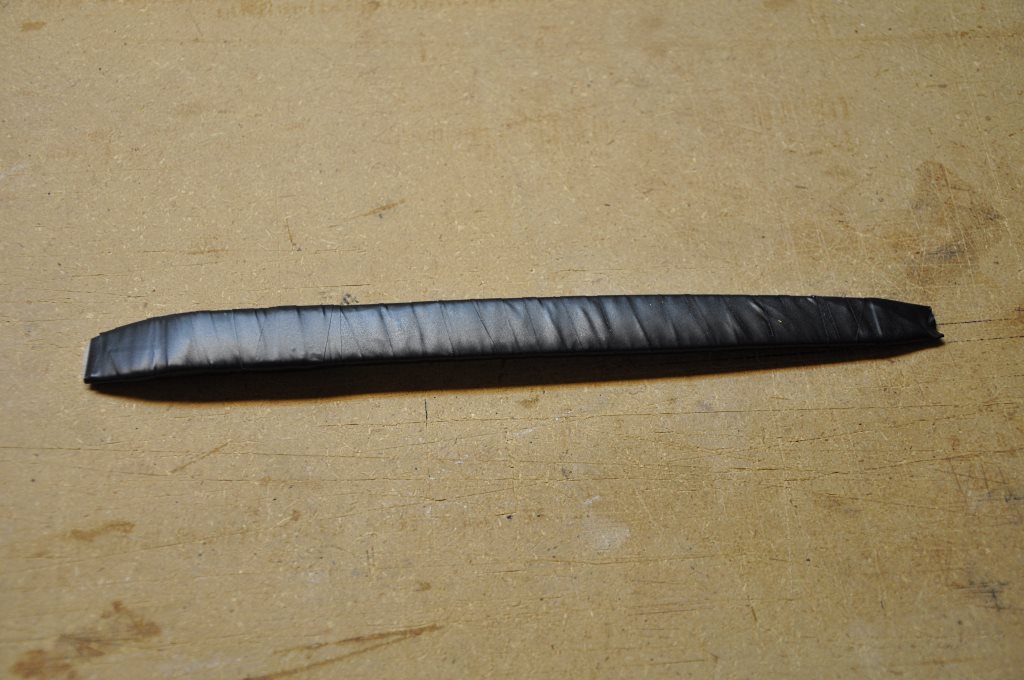
I wrap these sorts of layups with electrical
tape.
The tape can be pulled tight as it is wrapped providing good compression to the part.
The tape can be pulled tight as it is wrapped providing good compression to the part.
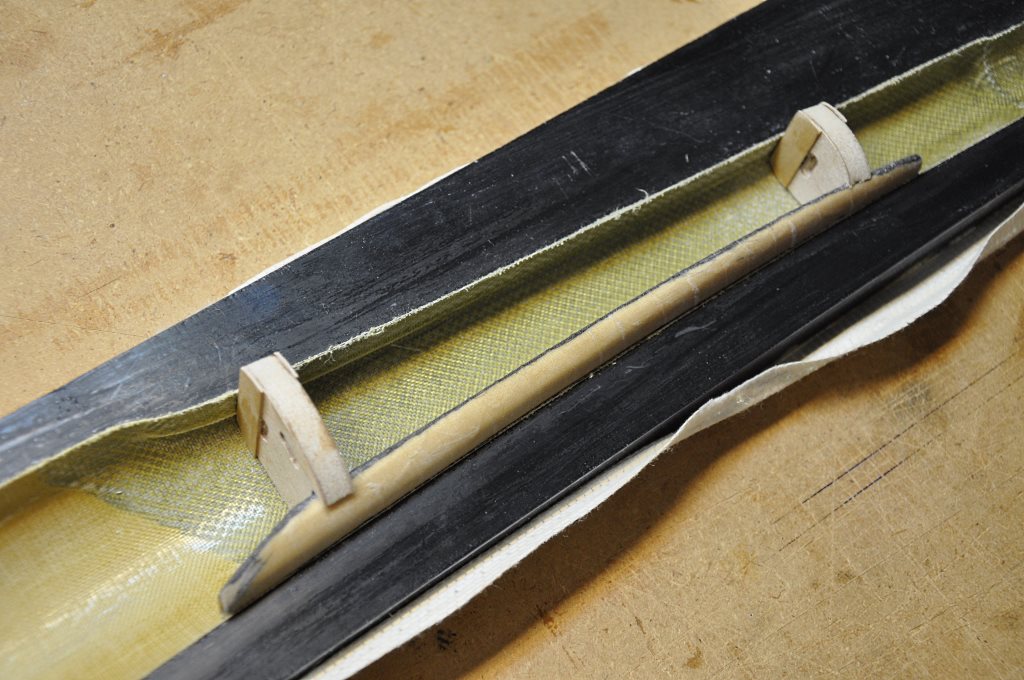
Once the tow beam has cured, cut notches into the
bottom of the bulkheads so that they can sit properly in place on
the beam.
In this shot I took advantage of my fuse pod mold to securely hold the pod half while doing the test fitting of the bulkhead/beam assembly.
In this shot I took advantage of my fuse pod mold to securely hold the pod half while doing the test fitting of the bulkhead/beam assembly.
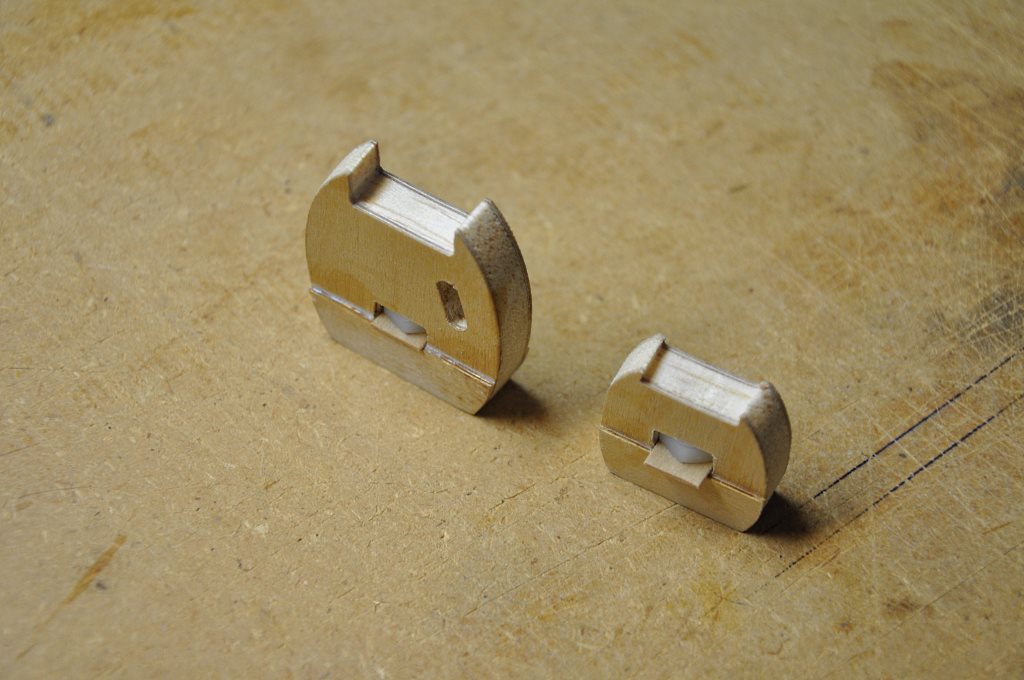
You will notice that the bulkheads get a second
1/32" plywood doubler at the top (in this picture the bulkheads are
upside down) - normally that gives the nylon nut enough of a bearing
surface to keep it from pulling up into the balsa under load.
With these particular bulkheads, I used 1/4" balsa instead of 3/16" (not entirely sure why now...) and I discovered that the nylon nuts didn't have enough contact with plywood for my peace of mind - so I inserted small 1/32" plywood "washers" to provide a better bearing surface.
With these particular bulkheads, I used 1/4" balsa instead of 3/16" (not entirely sure why now...) and I discovered that the nylon nuts didn't have enough contact with plywood for my peace of mind - so I inserted small 1/32" plywood "washers" to provide a better bearing surface.
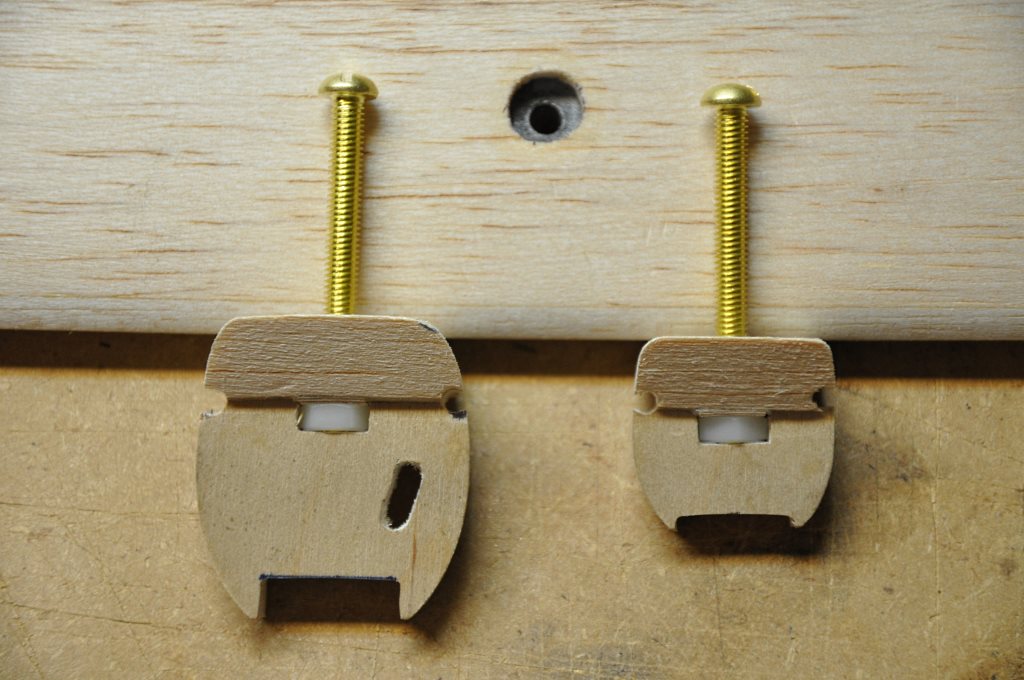
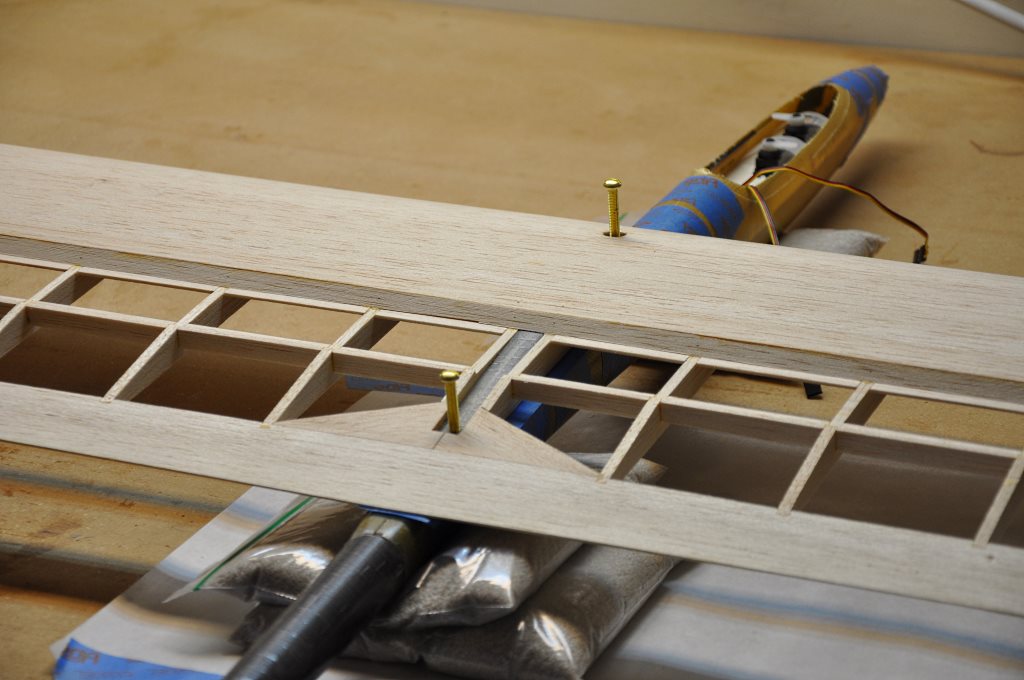
Next we need to add hard balsa supports over the
plywood doublers.
You will also note that I have drilled pushrod holes into the bulkheads.
Note: you will see several pictures of these brass bolts - they were only temporary hardware used during the manufacturing process: I didn't want to damage or stress the nylon bolts until the plane was completed...
You will also note that I have drilled pushrod holes into the bulkheads.
Note: you will see several pictures of these brass bolts - they were only temporary hardware used during the manufacturing process: I didn't want to damage or stress the nylon bolts until the plane was completed...
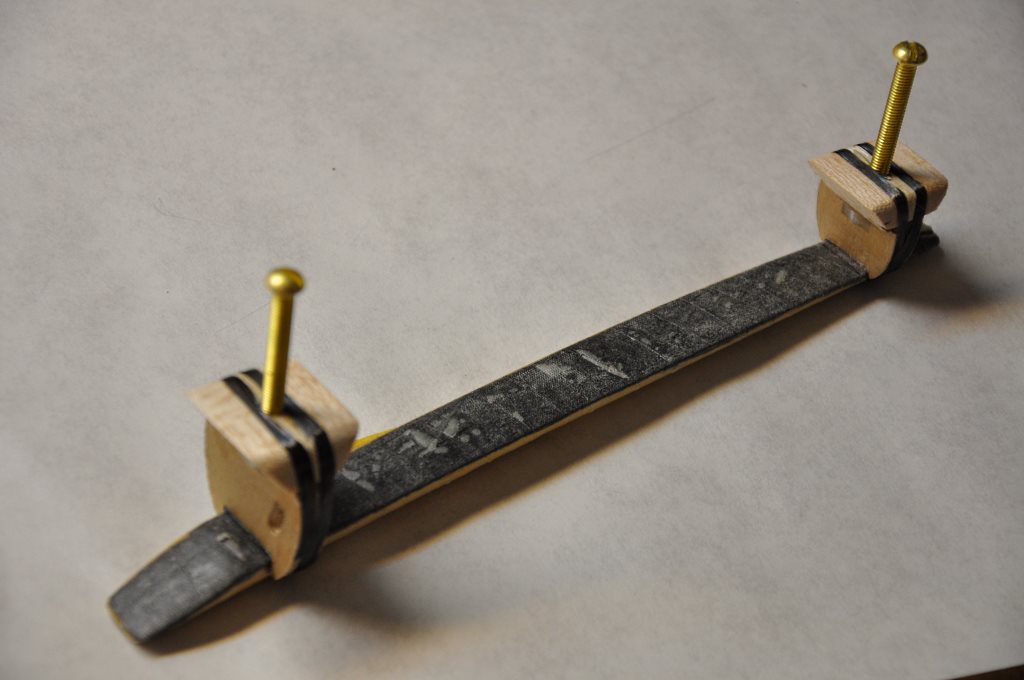
Use thickened epoxy to glue the bulkheads to the
tow beam, and then wrap 3k carbon fiber tow 6 times around the
bulkhead perimeter.
Brush epoxy onto the carbon to saturate and then blot off the excess.
Note: I actually inserted the bulkhead/tow beam assembly into the fuse pod and attached the wing center panel to the bulkheads during the gluing of the beam assembly - This is important so that everything lines up correctly. I lined the pod with wax paper to prevent the bulkheads from sticking to the pod.
Your other option is to do this glue-up at the same time you join the pod halves...
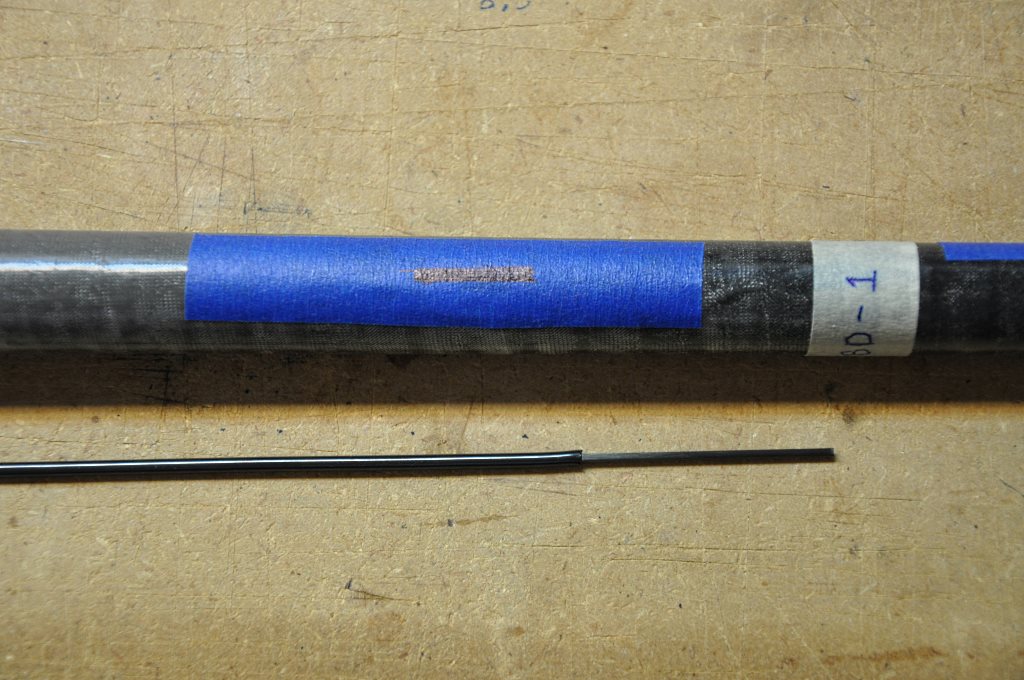
I'm going to route my pushrods internally on this
Bubble Dancer, so I need to cut exit slots at the end of the tail
boom.
I taped off and marked the location of the exit holes. I then twisted the point of my blade to start a hole in the boom and then used a round file to gradually lengthen the slot horizontally.
You want to make sure that the pushrod can exit at as shallow an angle as possible.
I taped off and marked the location of the exit holes. I then twisted the point of my blade to start a hole in the boom and then used a round file to gradually lengthen the slot horizontally.
You want to make sure that the pushrod can exit at as shallow an angle as possible.

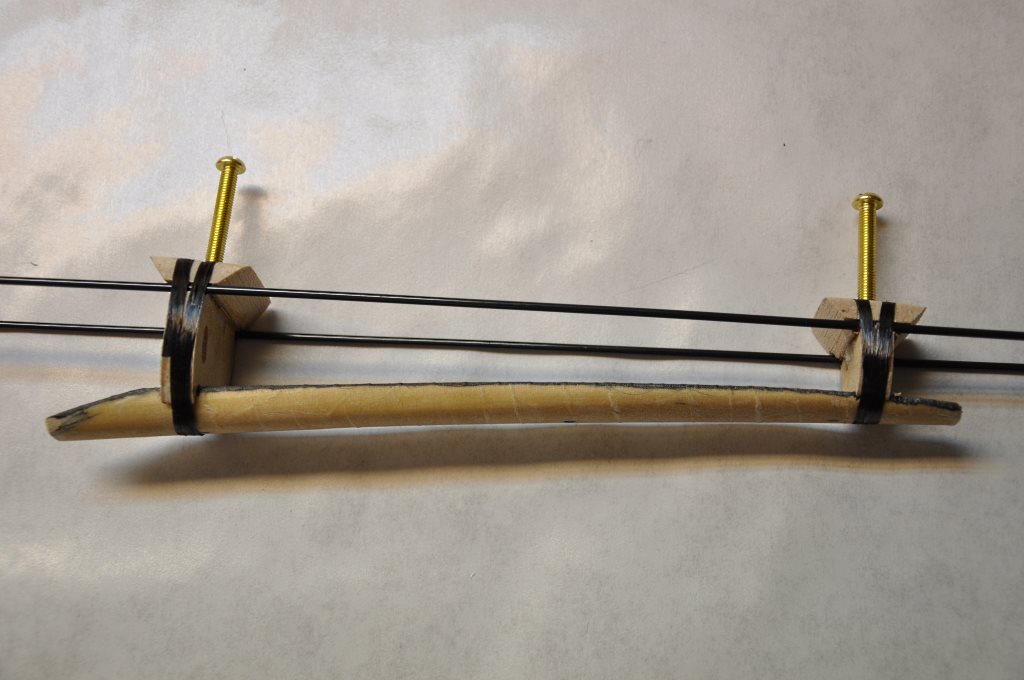
Now that we have the slot cut we can check the
fit.
We want to make sure that the rod exits smoothly and that there is no binding.
We want to make sure that the rod exits smoothly and that there is no binding.
At this point, I'm just about ready to glue the
pod halves together.
I have the pushrods placed in the bulkheads.
I have the pushrods placed in the bulkheads.
Using slow epoxy to give myself plenty of working
time, I placed strips of Kevlar around the perimeter of the pod to
join the pod halves.
I used thickened epoxy on the bottom of the tow beam and around the perimeter of the bulkheads to ensure good contact with the pod.
Then very carefully, I brought the pod halves together and used tape to hold them until the glue cured.
Note: at this stage I did not glue the boom to the pod. I did that as a second step later.

Once the tail boom was glued, I placed metal
wires into both pushrod tubes and used strong magnets to align the
pushrods the way that I wanted them to go.
I then tipped the boom vertically and dribbled a good amount of thin CA through the elevator pushrod exit hole.
The CA was able to run down the tube, firmly affixing the tubes to the inside of the boom.
For the best write-up I've ever seen of this process check out this posting on RCGroups.
I then tipped the boom vertically and dribbled a good amount of thin CA through the elevator pushrod exit hole.
The CA was able to run down the tube, firmly affixing the tubes to the inside of the boom.
For the best write-up I've ever seen of this process check out this posting on RCGroups.
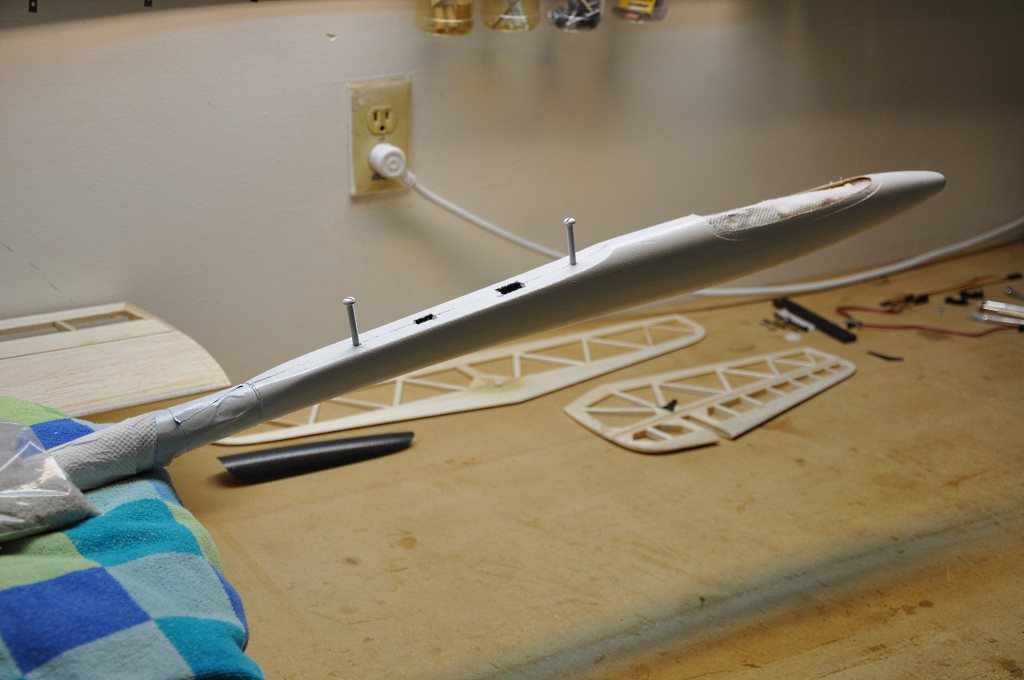
My personal taste is for fuselages to be painted.
I know this adds "useless" weight to the glider but I'm willing to
take that trade-off...
So I masked off the pod, left the brass bolts in the bulkheads to keep paint from gumming up the threads and then took the fuse outside to spray it with white paint.
Once painted, I propped the fuse up inside to dry.
So I masked off the pod, left the brass bolts in the bulkheads to keep paint from gumming up the threads and then took the fuse outside to spray it with white paint.
Once painted, I propped the fuse up inside to dry.
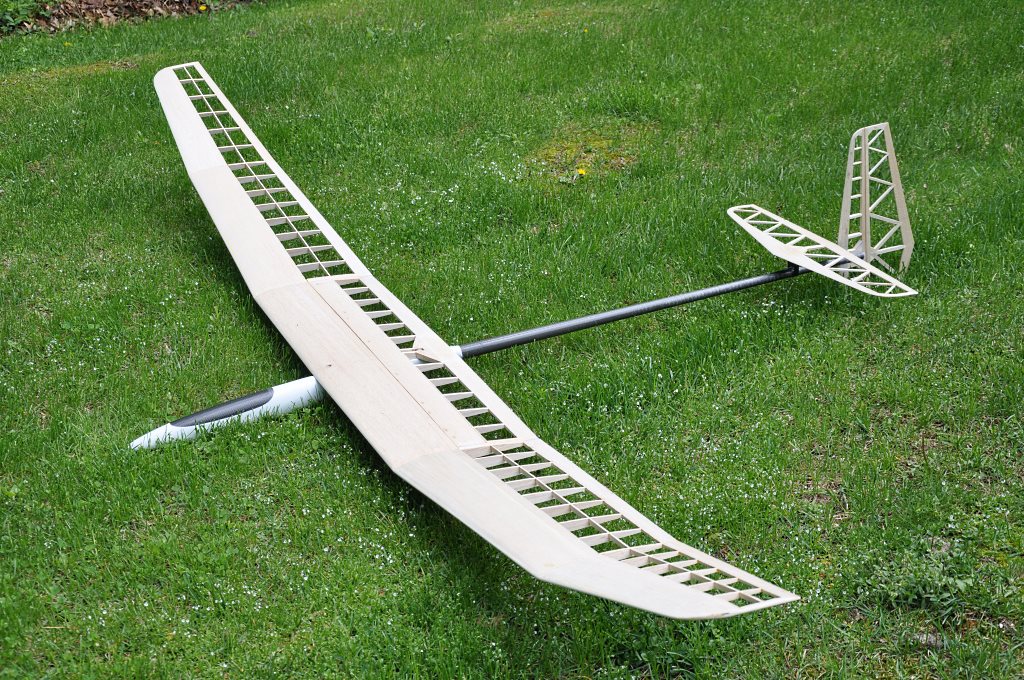
Once the plane was ready for covering, I just had
to take it outside and get some great shots of it in all it's bare
balsa glory! :-)
Wow, that looks great!
Wow, that looks great!