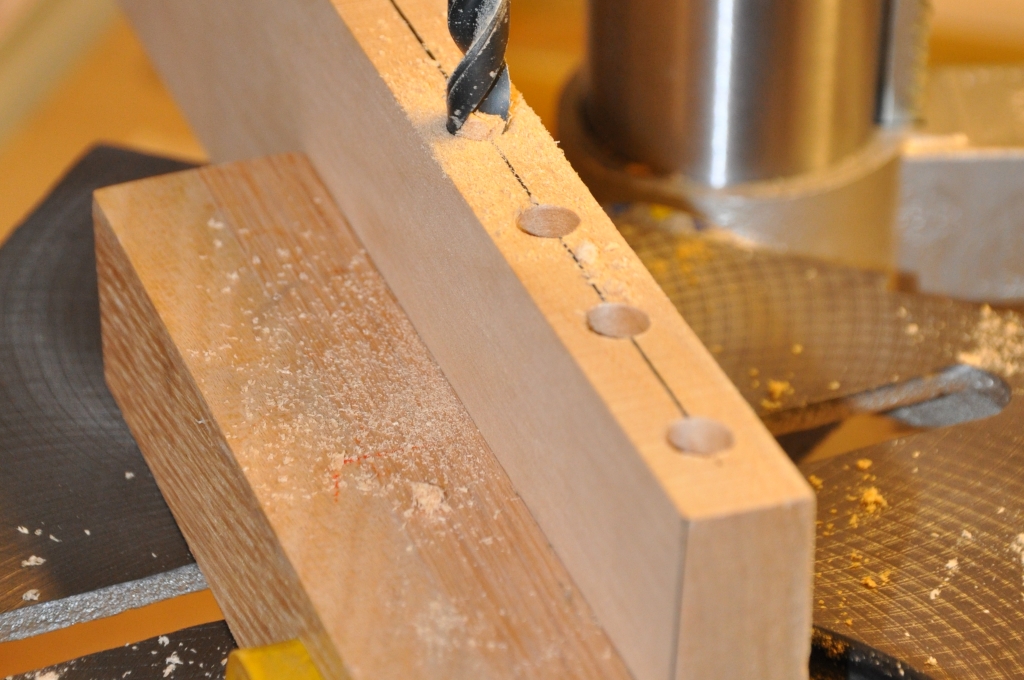
To make the wing joiners, drill 4 holes into a
block of basswood. See
joiner_V2.pdf and
joiner_build.pdf for details.
Once I had the holes drilled, I cut the block into 4 pieces and then shaped them with my belt sander.
Once I had the holes drilled, I cut the block into 4 pieces and then shaped them with my belt sander.
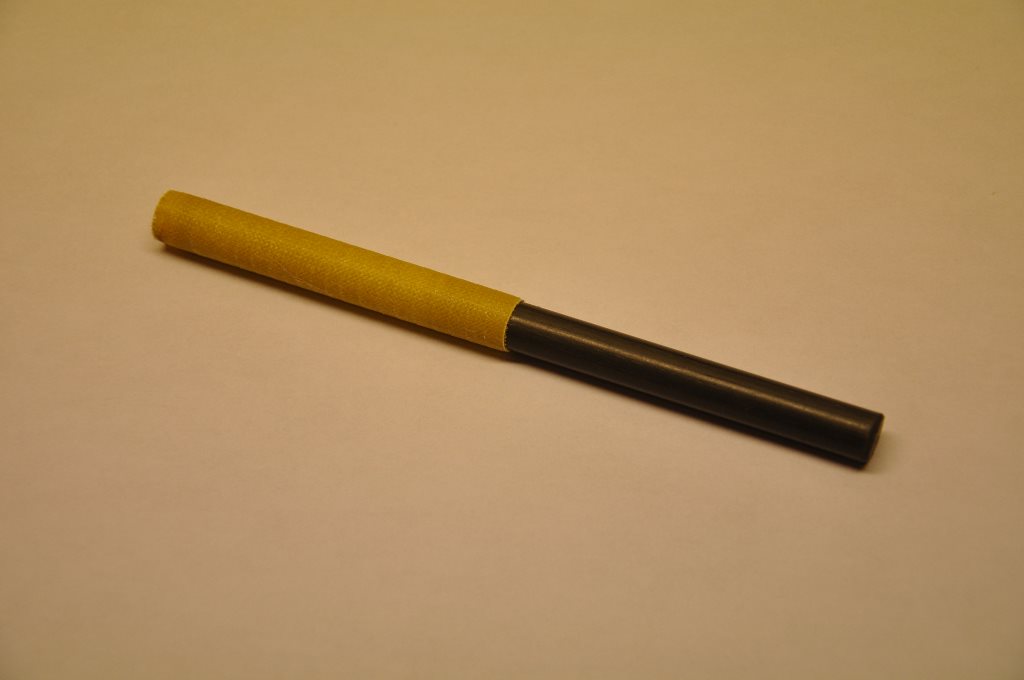
Since I'm "doing it right" with this build, I
made Kevlar joiner rod tubes this time. The Kevlar tubes are
significantly lighter than brass ones. You can see my write-up
on making these tubes on my Kevlar Tubes
page.
I made the holes in the basswood blocks such a tight fit to the tubes that I was able to press the tubed into place - without the use of epoxy - thereby saving some weight in the joiners.
Final shaping of the blocks was done as matched sets with tubes and rod inserted - with constant comparison to the plans.

Always interested in the weight, it looks like my
joiner blocks are 12.5 grams.
The plans call for these to be 18 grams so I am way under budget on these - Awesome!
In all fairness, the plans don't elaborate if the 18 grams is for the joiner blocks and the trailing edge joiners, but as my trailing edge joiners came out at 1.2 grams - I'm still very much to the good...
The plans call for these to be 18 grams so I am way under budget on these - Awesome!
In all fairness, the plans don't elaborate if the 18 grams is for the joiner blocks and the trailing edge joiners, but as my trailing edge joiners came out at 1.2 grams - I'm still very much to the good...

Here is a shot of the finished right side joiner
blocks.
They came out exactly the same weight as the left side - certainly the way we like things to be!
Just a note for installing the joiners into the spar on assembly: You must install the blocks as a unit. That means inserting the carbon joiner rod (make sure it's waxed somehow so it's not glued in place) into the blocks and then placing the blocks into the wing spar glue-up. This will ensure that the center and mid panels line up correctly in the finished wing.
Skipping forward to almost the completion of the
build...
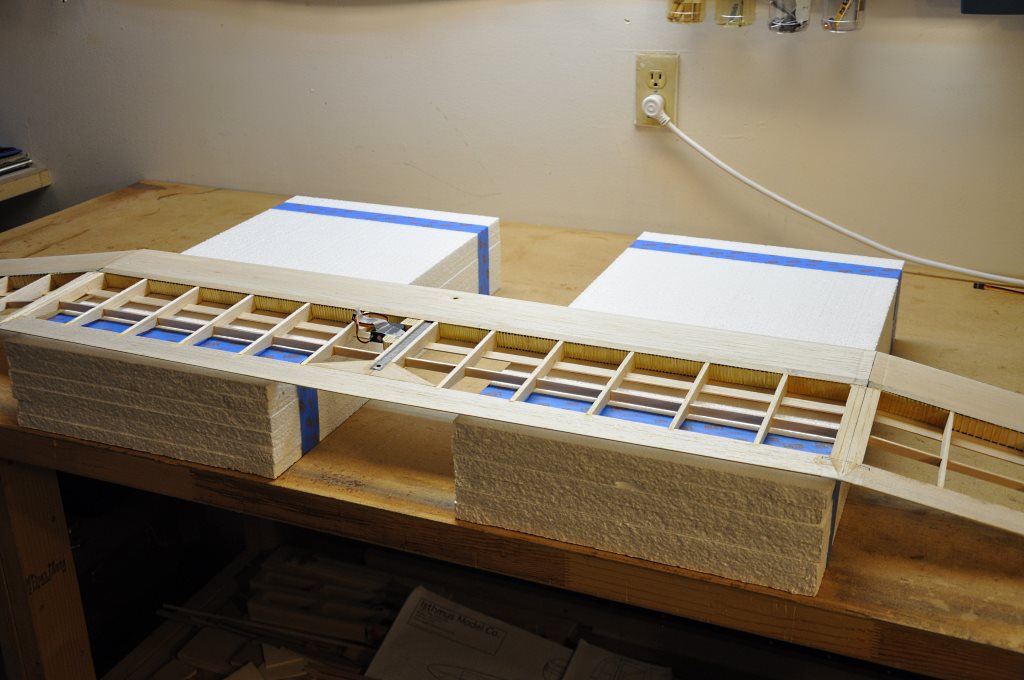
Now I need to install the trailing edge pins. (I think for wing #3, I might devise a way to install the trailing edge pins during the wing build on the jig - we'll see...)
I flipped the entire wing upside-down on two blocks of foam to allow access to the underside of the wing at the trailing edges.
Now I need to install the trailing edge pins. (I think for wing #3, I might devise a way to install the trailing edge pins during the wing build on the jig - we'll see...)
I flipped the entire wing upside-down on two blocks of foam to allow access to the underside of the wing at the trailing edges.
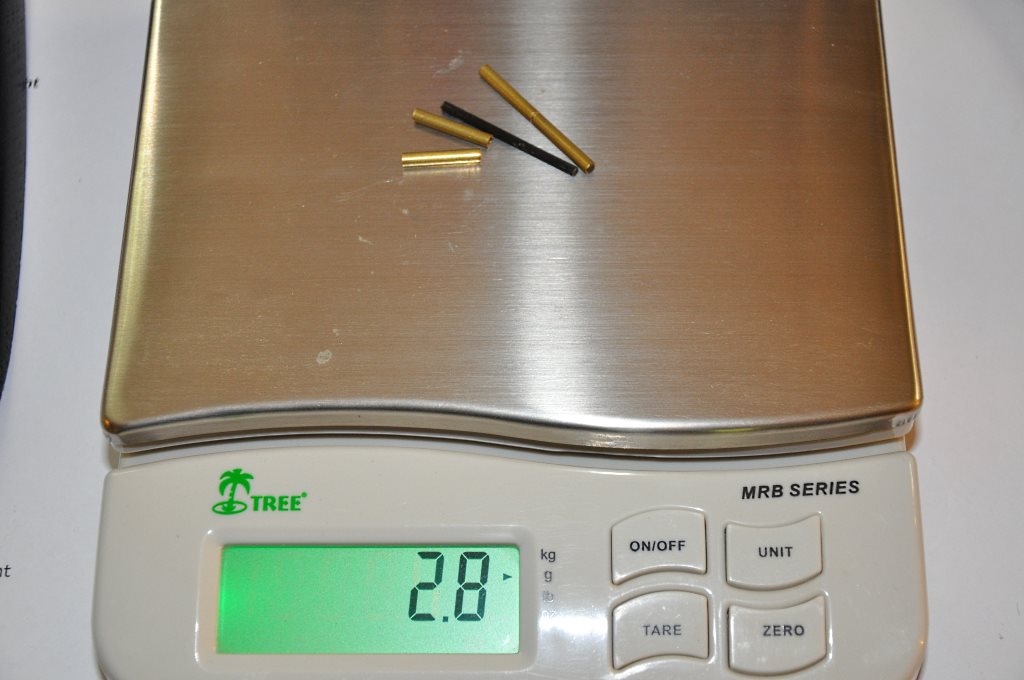
The trailing edge pins are made from .080" or
.098" dia. carbon fiber rods inside 1/8" brass tubes.
As we can see here, 1.4 grams per wing.
I cut the brass tubes in half before installing them in the wings.
As we can see here, 1.4 grams per wing.
I cut the brass tubes in half before installing them in the wings.
On the first Bubble Dancer I made, I did not
trust myself to make a suitably strong joint at the trailing edge
pins - so I added some triangle blocks to the center and mid panels
as a way to "Beef Up" the location of the trailing edge pins.
This worked fine, but as with all such choices, added weight.
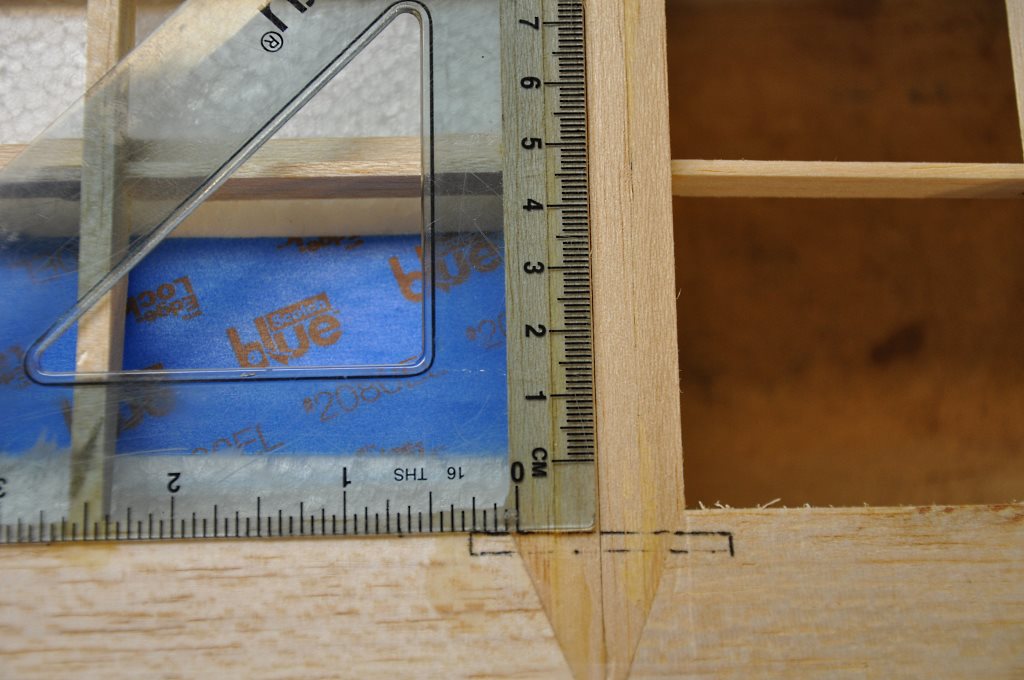
This time I forced myself to follow the plans and place the pins in the existing trailing edge without modification.
I marked off the area where the pins were to be inserted - making sure that the slot would be perpendicular to the wing joint.
This time I forced myself to follow the plans and place the pins in the existing trailing edge without modification.
I marked off the area where the pins were to be inserted - making sure that the slot would be perpendicular to the wing joint.
I then masked off the area I did not want to
damage with some blue masking tape.
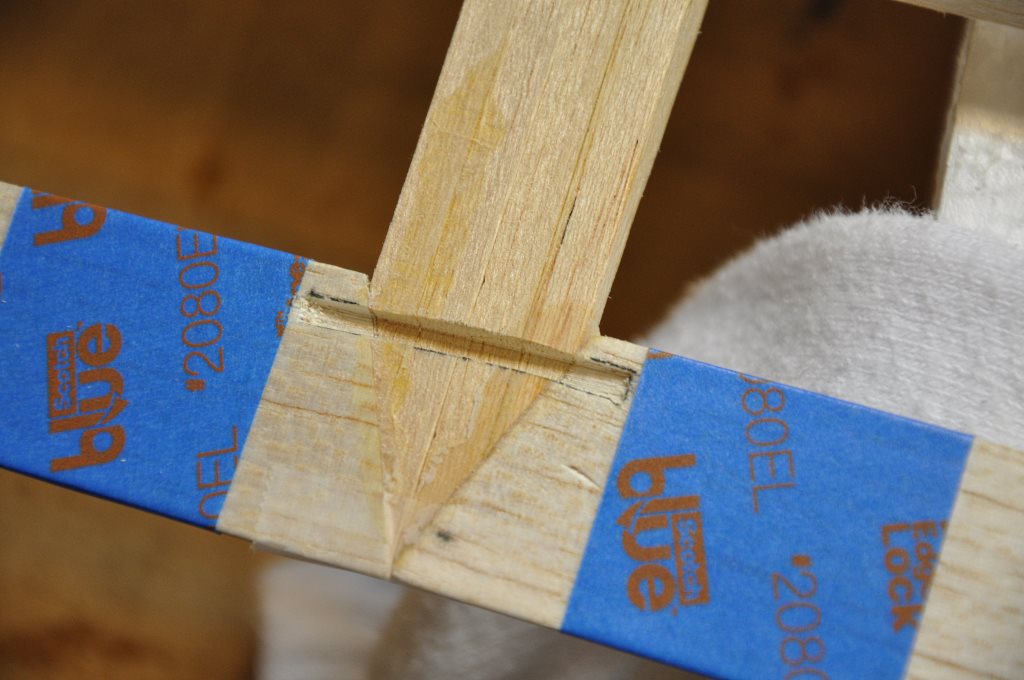
I took a little sanding block I made of the same dimension as the trailing edge brass tube and began to cut a groove in the trailing edge.
Using a combination of sanding and cutting, I got the slot to the size of the tube.
I took a little sanding block I made of the same dimension as the trailing edge brass tube and began to cut a groove in the trailing edge.
Using a combination of sanding and cutting, I got the slot to the size of the tube.
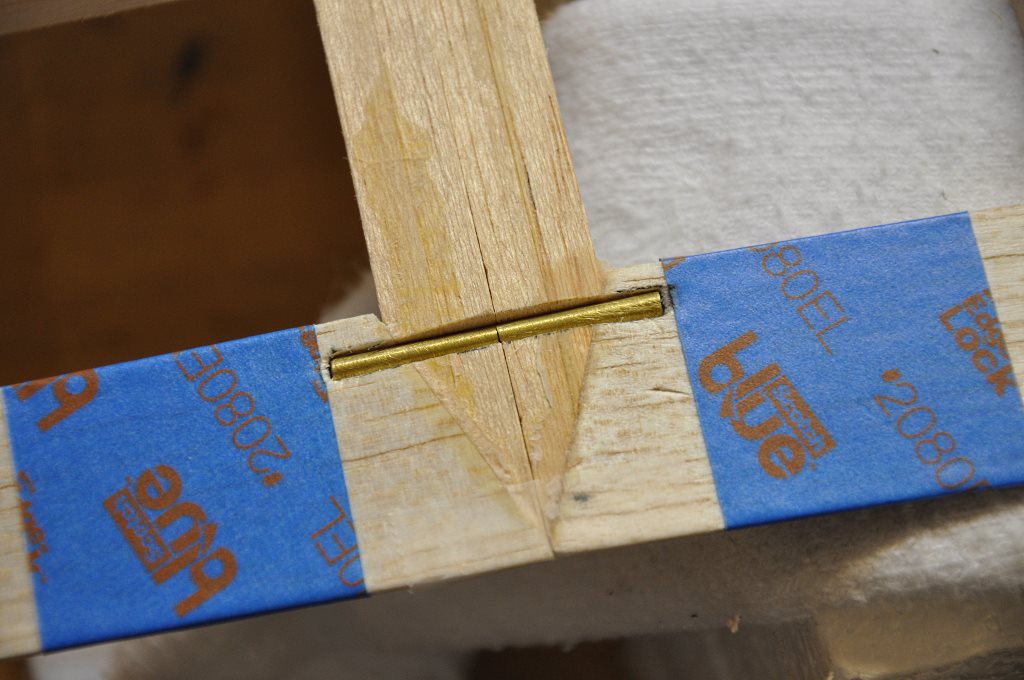
Once the slot is cut, insert the trailing edge
tubes (ensure the carbon fiber pin is inside to keep everything in
alignment).
I used thickened epoxy to glue the pins in place.
I used thickened epoxy to glue the pins in place.
The trailing edge pin area is pretty weak at this
point and requires some fiberglass patching to make it sufficiently
strong.
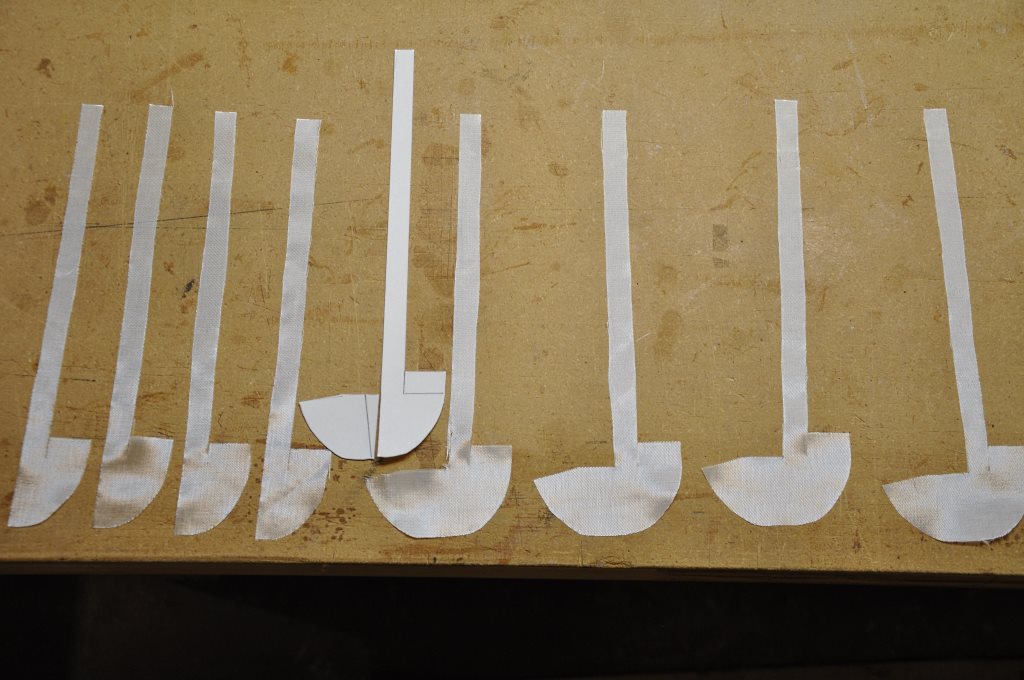
The ribs at the wing joints also require fiberglass patching, so I am going to do both items at the same time.
I made a template of the rib and trailing edge patches, and then cut 16 (in this shot you only see half) 1.5 oz. fiberglass patches.
You will note in this shot, half of the patches have an extra side to them - this is because we need to wrap fiberglass around the rib at the trailing edge to keep the pin from pulling out under load.
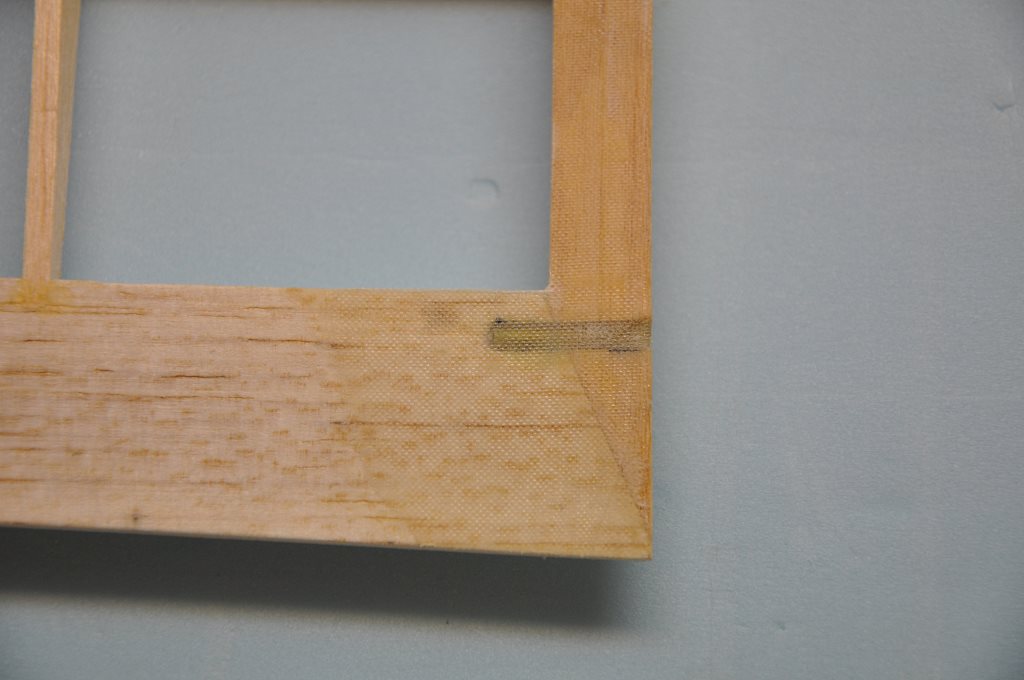
Using laminating epoxy, I brushed the bottom
fiberglass patches in place.
Remember, each panel gets 4 patches - two on the bottom and two on the top.
Here is the bottom after the epoxy cured and the glass was cleaned up and sanded smooth.
Remember, each panel gets 4 patches - two on the bottom and two on the top.
Here is the bottom after the epoxy cured and the glass was cleaned up and sanded smooth.
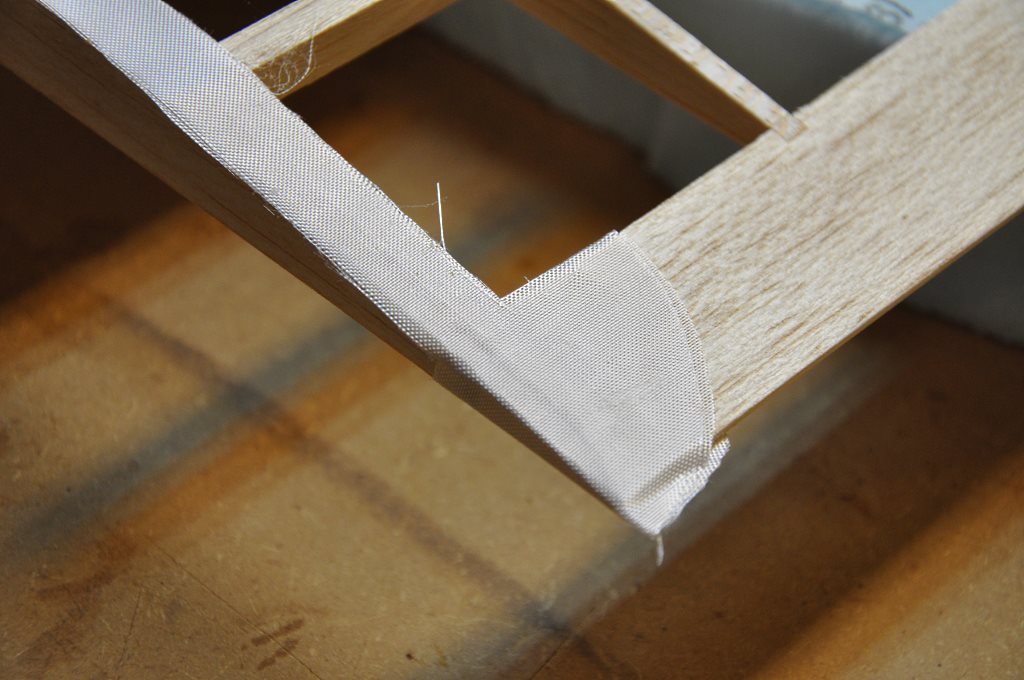
Once the bottom patching was done, I turned the
panels over and repeated the process for the top.
In order for the trailing edge wrap-around tabs to stay in place, I lightly misted these patches with 3M #77 and then tightly stuck them in place.
I then brushed the laminating epoxy onto the glass, let it cure, trimmed and sanded to finish off the joint.
In order for the trailing edge wrap-around tabs to stay in place, I lightly misted these patches with 3M #77 and then tightly stuck them in place.
I then brushed the laminating epoxy onto the glass, let it cure, trimmed and sanded to finish off the joint.