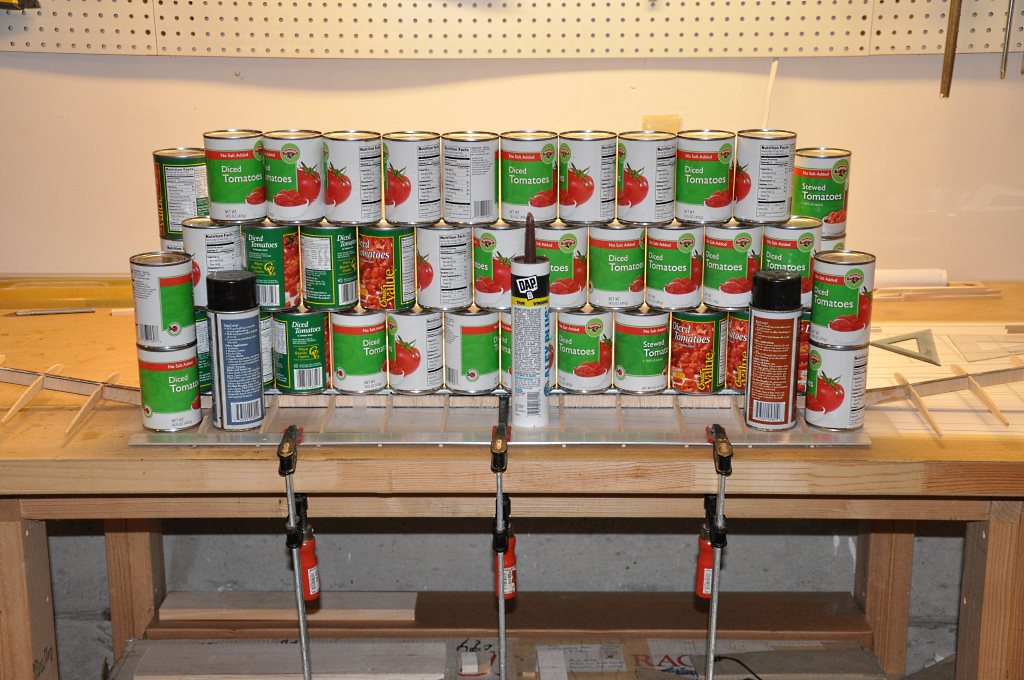
I discovered something interesting while using
the "stack your wife's vegetable cans" method of wing spar
compression - worry that it will all tip over makes it hard to
sleep...
In truth, while building each of the five wing panels separately on a flat surface requires the least preparation, the result was 6 days of the bench being occupied while waiting for the various panels to cure.
Additionally, the panels needed work to mate accurately once they were all glued up. This added days of needless work. I decided I'd do it differently the next time.... I. Would. Build. A. Jig.
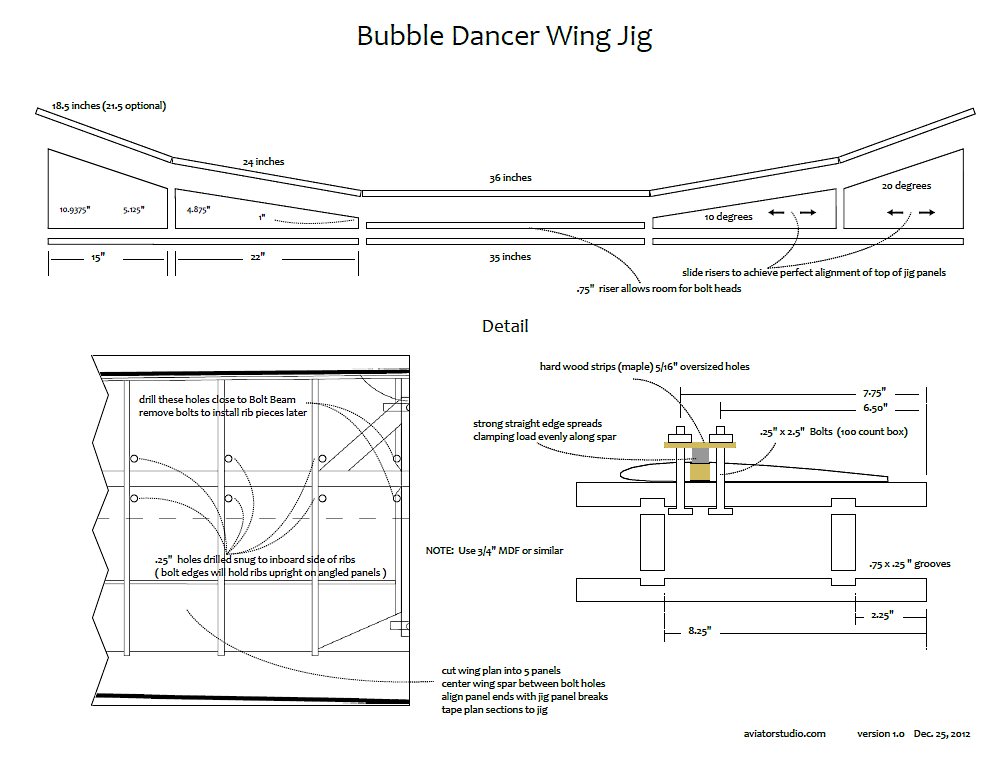
The jig needed to be strong, dead flat on each
panel, accurately jointed and provide good clamping of the spar
glue-up.
After thinking about the least expensive way to provide clamping, I came up with the idea of using 1/4 inch diameter bolts which I could buy at my local Lowes in a box of 100 - perfect!
If you are thinking that this is too much work to go through for making a wing... you might be right, however; I think that the jig gives time savings, accuracy and significant weight savings... continue reading!
Here is the PDF file for the wing jig.
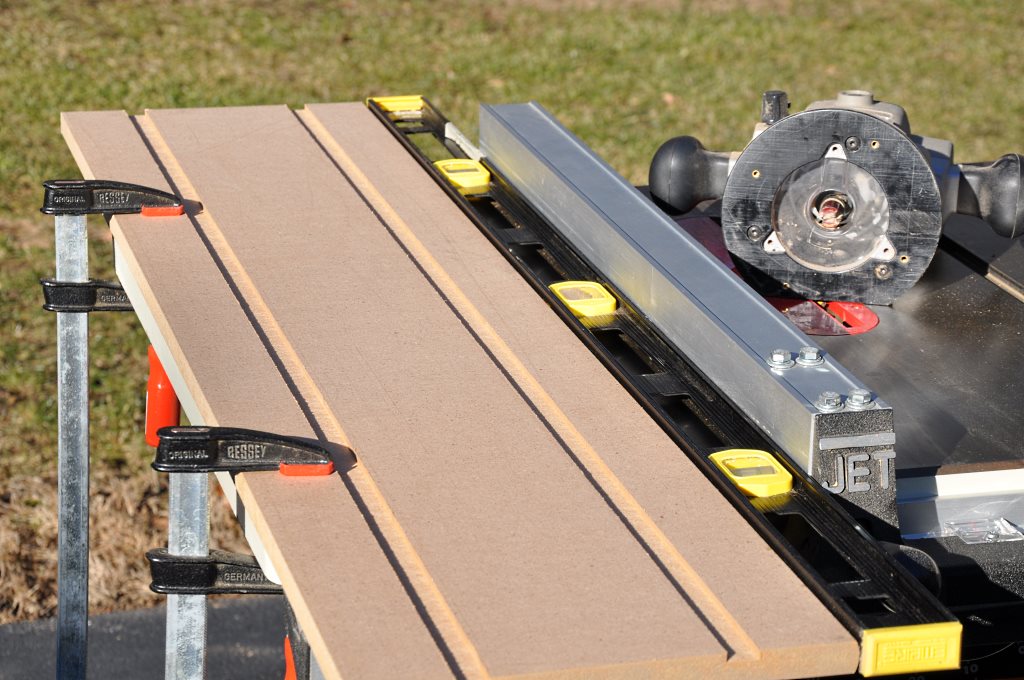
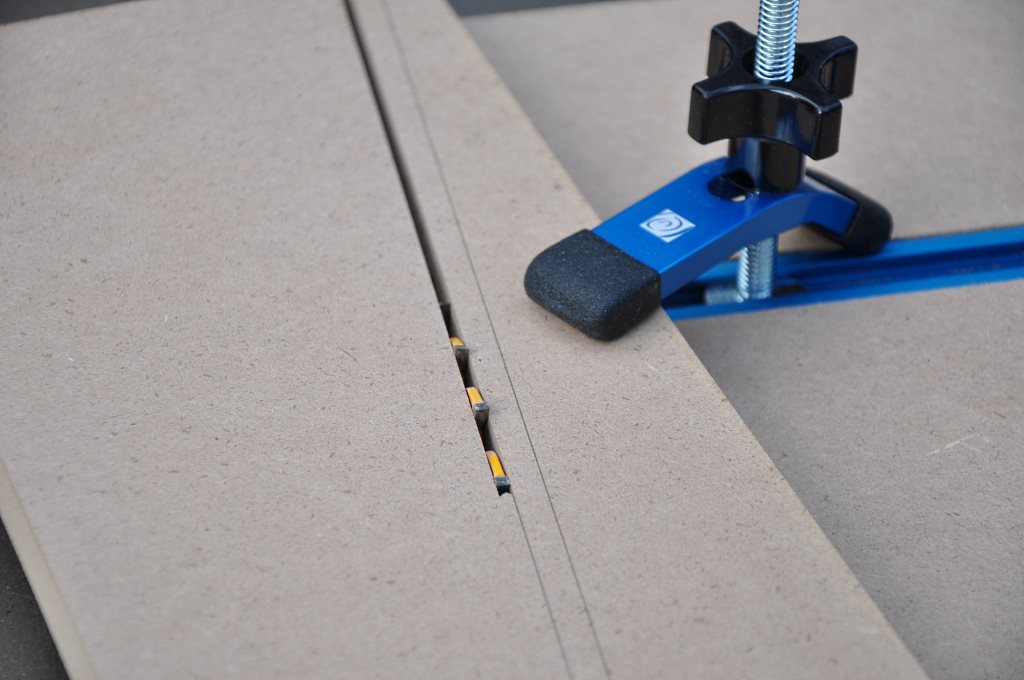
I used "inexpensive" MDF which I then cut using
my woodshop tools.
I started by routing 2 grooved in the bottom "runners" and then again on the bottom sides of the individual wing panel surfaces.
In order to ensure that the grooves of the runners and the panels line up - always measure and cut from the same side of the boards.
In the image you see one of the runners after both grooves have been cut. The runners allow for the risers to slide back and forth for very precise vertical alignment of the panel surfaces.
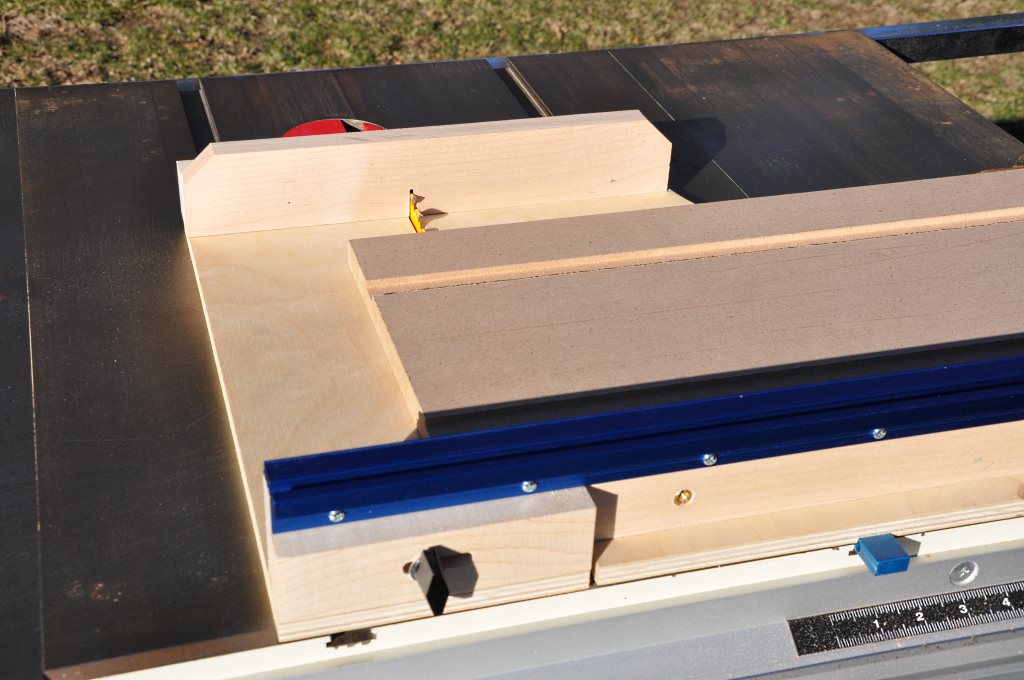
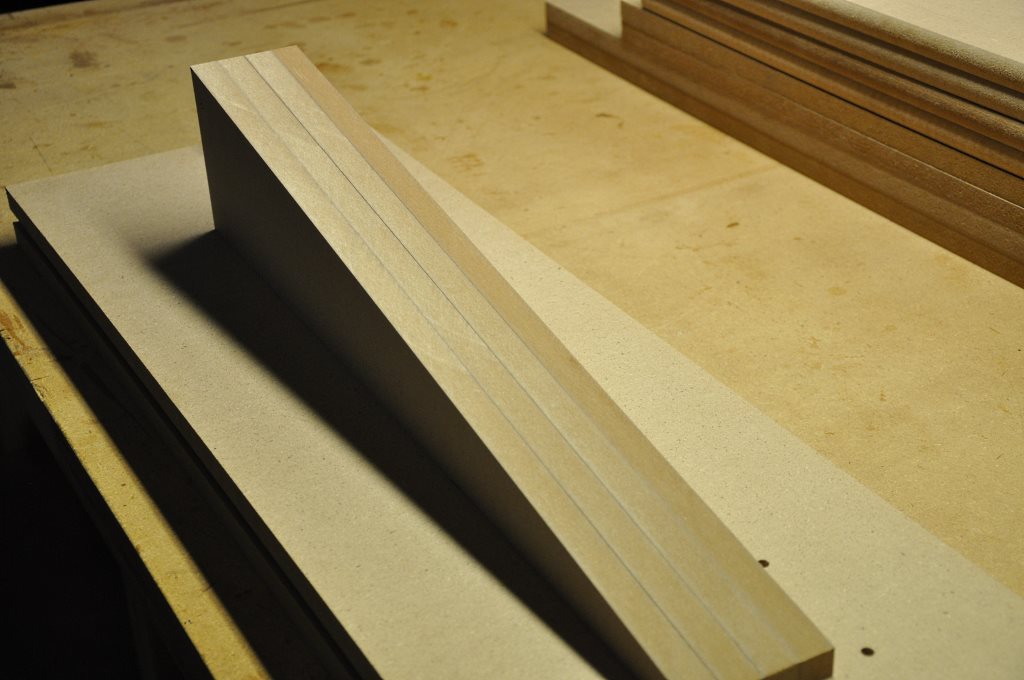
Next I used my table-saw to cut each panel to the
exact width.
Keep in mind that these panels must precisely match the wing plan widths that we will be taping on them during the actual build.
Note that I use a crosscut sled to do this cut. For those who are interested, the plans for this sled (which I also made) are found at PlansNow.com. Here is the direct link.

The bolt holes that I will drill in the jig need
to not get in the way of the spar or any of the ribs.
Additionally, they need to be close to the inboard (downhill side) of each rib, as the placement of the bolts has the happy side-effect of keeping the ribs on the angled panels vertical during setup.
I measured the plans accurately, and marked the location for each bolt hole on the panels. I did give a little extra space from the rib sides, just in case my hole didn't turn out quite right... you don't want a bolt interfering with where a rib is supposed to be!
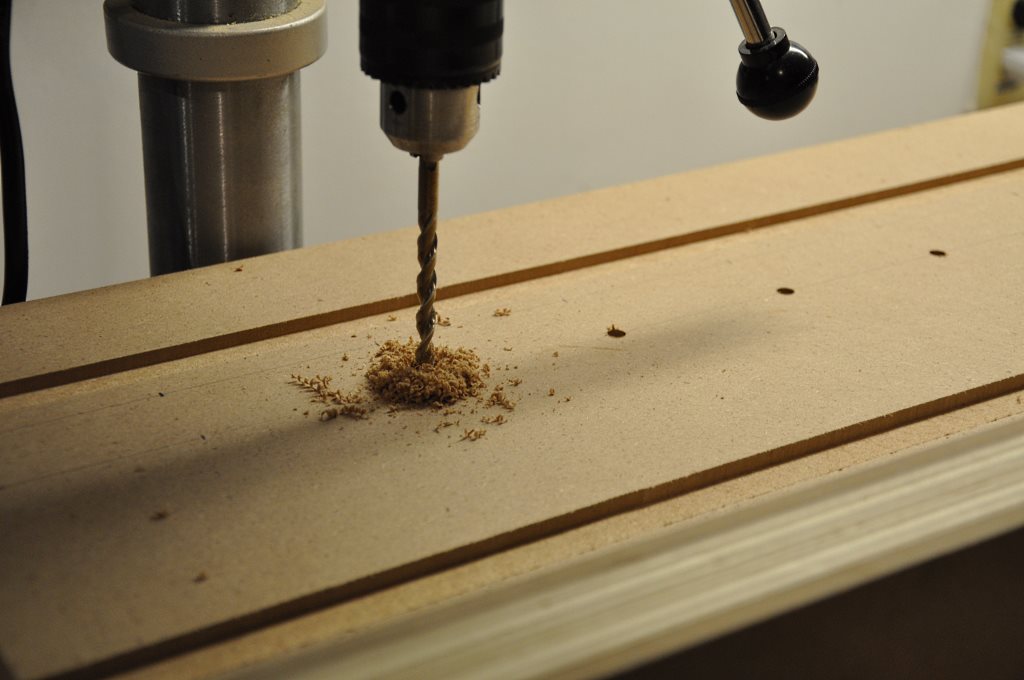
I then drilled each hole as marked on each panel
with a 1/4 inch drill bit.
The bolts will be press-fit into these holes and once in, they will stay in place on their own - something that will make life a lot easier once assembly starts.
The bolts will be press-fit into these holes and once in, they will stay in place on their own - something that will make life a lot easier once assembly starts.

I made another jig from PlansNow.com - a taper
jig, found here, for
making the angled "risers".
The length of the risers is not as important as getting the 10 and 20 degree angles correct. You will be making four 10 degree risers and four 20 degree risers - and they each must be exact with the others, so taking your time to accurately set up the jig is a must.
In case anyone is wondering why my table saw it outside - I have it on wheels and if the weather is ok, I roll it out so the sawdust doesn't fill my shop!
I love this picture, because it show the absolute
precision that can be achieved with the taper jig!
The two lines on the board are just because I realized I marked the first line incorrectly and had to move it over a bit...
The two lines on the board are just because I realized I marked the first line incorrectly and had to move it over a bit...
The four 10 degree risers. Absolutely
accurate! Yay!
Once I got all the pieces machined, I did a trial
setup on the workbench.
Everything looks good.
Everything looks good.
I then cut my wing plans to the exact width of
each panel.
Using regular tape I taped the plans to the corresponding jig panel. You want to make sure that the entire length of all 5 panels have the spar lined up accurately - remember we will be building our wing all at once.
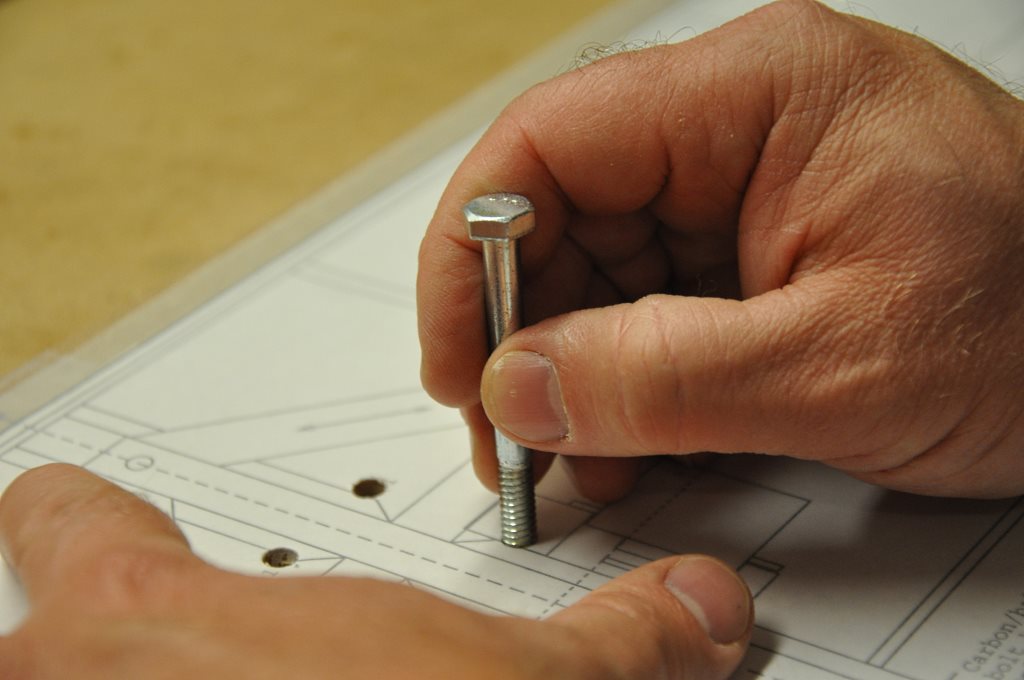
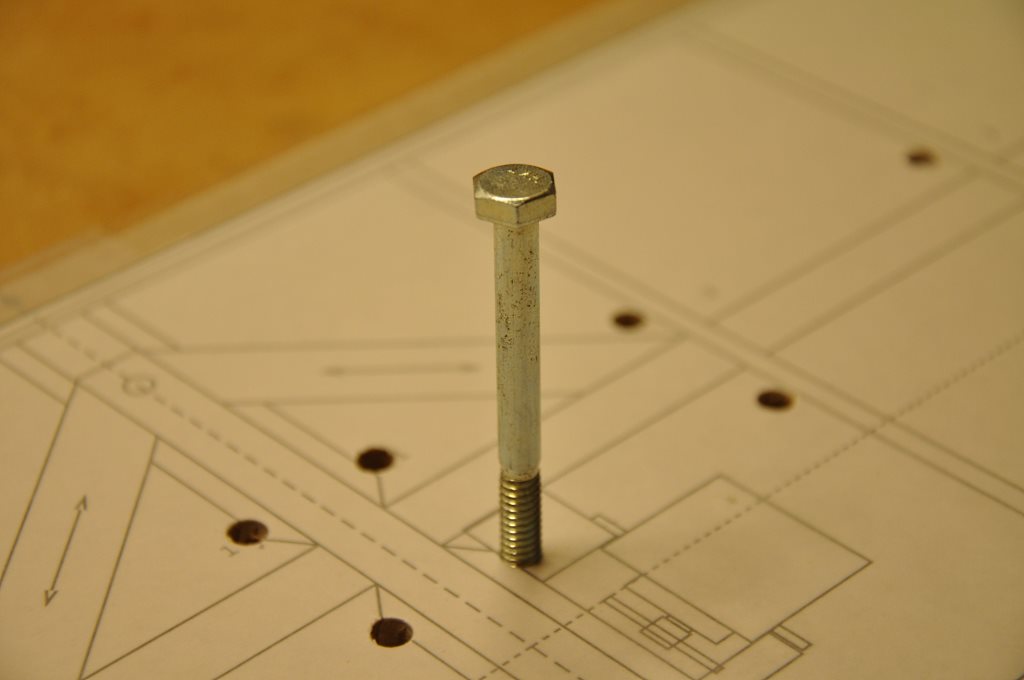
Next I used one of the jig bolts to punch the bolt holes in the plans.
I then taped wax paper over the plans for glue protection and punched bolt holes in the wax paper.
Using regular tape I taped the plans to the corresponding jig panel. You want to make sure that the entire length of all 5 panels have the spar lined up accurately - remember we will be building our wing all at once.
Next I used one of the jig bolts to punch the bolt holes in the plans.
I then taped wax paper over the plans for glue protection and punched bolt holes in the wax paper.
Yes, the bolt holes at the rib #1 locations
interfere with the ribs...
This was done on purpose, as the number 1 ribs do not take part in the spar layup - so I opted to have maximum clamping force available at the bolt beam location.
Once the spar is cured, these bolts can be removed for placement of the number one ribs.
This was done on purpose, as the number 1 ribs do not take part in the spar layup - so I opted to have maximum clamping force available at the bolt beam location.
Once the spar is cured, these bolts can be removed for placement of the number one ribs.
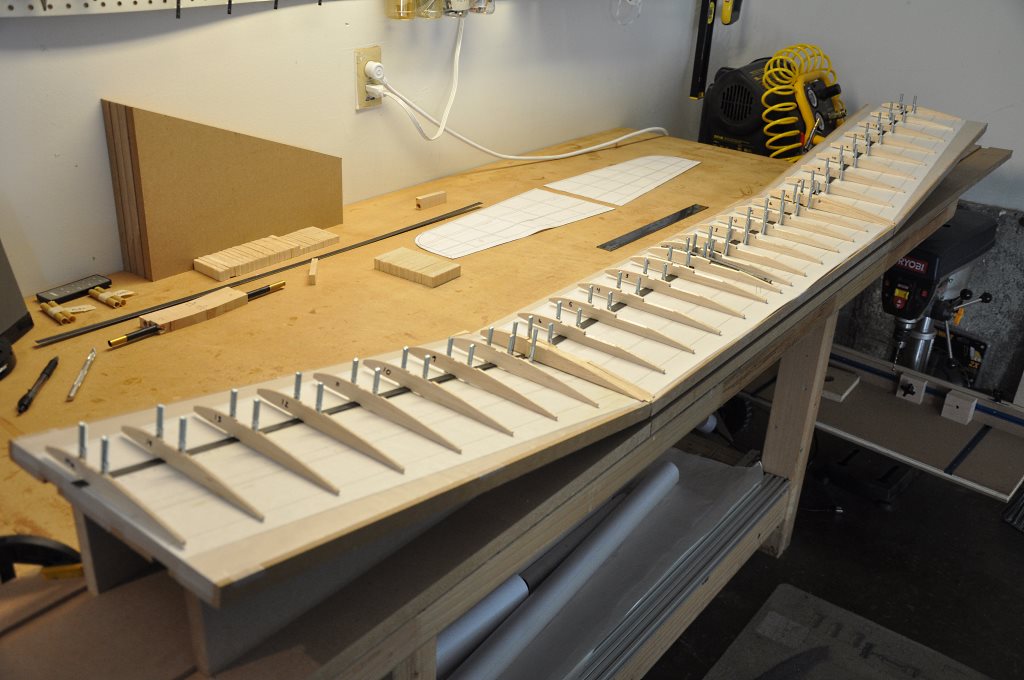
A trial placement of the ribs on the first 3
panels of the jig...
You can see how the ribs are able to rest against the jig bolts... handy, that.
You can see how the ribs are able to rest against the jig bolts... handy, that.
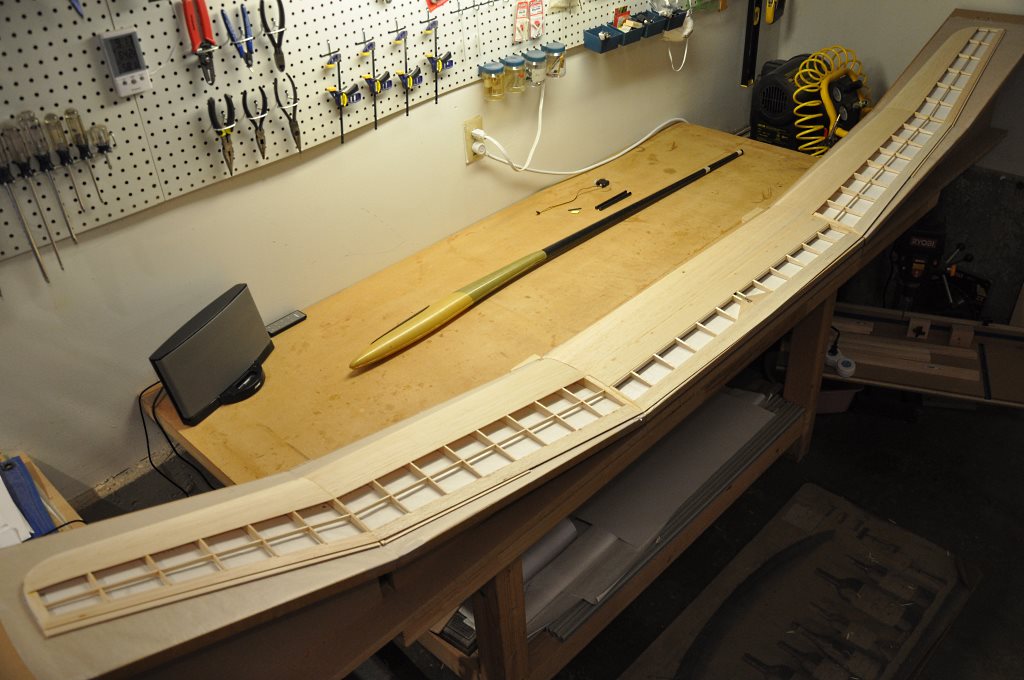
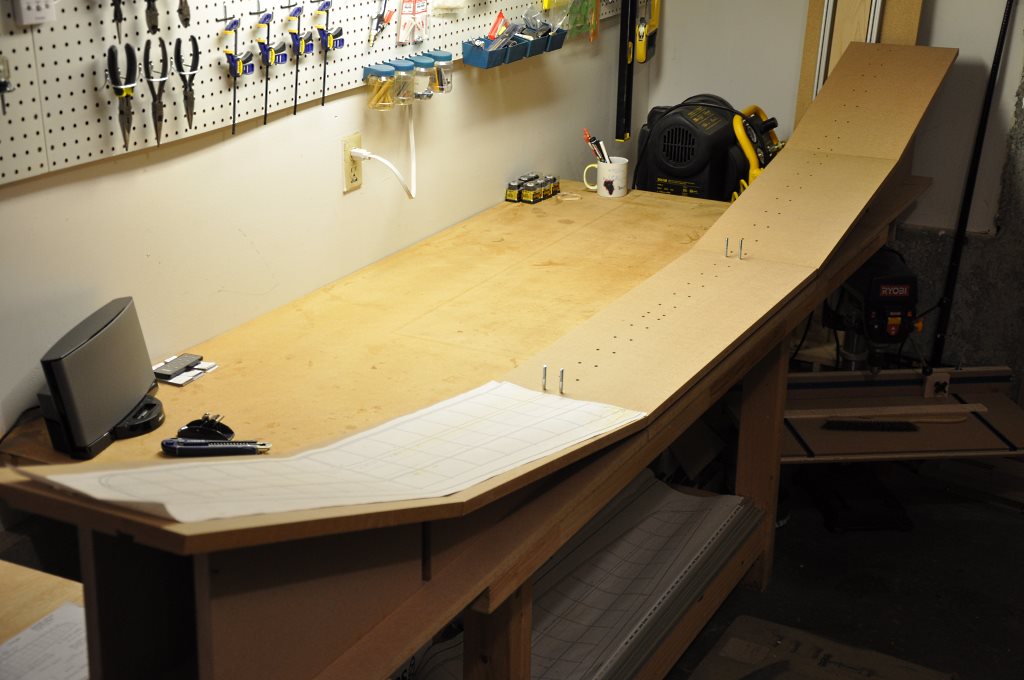
Here is the wing jig showing a wing nearing
completion.
The jig worked out great and improved the quality of the wing substantially, as well as reducing the time of construction.
The jig worked out great and improved the quality of the wing substantially, as well as reducing the time of construction.